Showing posts with label holiday. Show all posts
Wednesday, February 25, 2015
Roundups on Remodelaholic
In case you've missed it, I've been sharing decor round-ups over at Remodelaholic for the last year. Here are some of the fun topics I've shared over there. Check them out if you're looking for inspiration for your next DIY project. And let me know if there's a topic you'd love to see in the future!
Tuesday, November 4, 2014
Clutter-Free Holiday Season
As you may know, we're going to have a baby this holiday season.
As if that weren't excited and life changing enough, we also decided in the 11th hour to buy a new house. Yes, we're going to move somewhere around my 36th week of pregnancy. I'm trying to look on the bright side-- I won't get the inevitable day-after-moving aches because I won't be able to lift all the much.
With all of this going on, it is no wonder money is top of mind right now. Specifically, not spending all of it.
So I have a plan. I am going to try my hardest to do my holiday decorating and gift wrapping only with things I already have. No trips to Michael's for craft supplies. No picking up new gift wrap impulsively at Target or online (even if it is really beautiful) My goal is to clear out the closet of gift wrapping odds and ends (half rolls of paper, and carefully folded pieces I rescued from gifts I've received), use art supplies I already have on hand (sticky letters, felt, and glitter galore), and get creative with alternative wrapping materials.
I think it will be a fun challenge. Are you with me? I'll be sharing my attempts on Instagram. If you'd like to join in (and provide me with inspiration too!), use the hashtag #clutterfreeholiday when you share your decorating and gift wrapping ideas. Gifts count too! At the end, I'll share some of the ideas we've come up with. Sound good?
Let's do this!
Tuesday, April 1, 2014
Tombstone Cupcakes
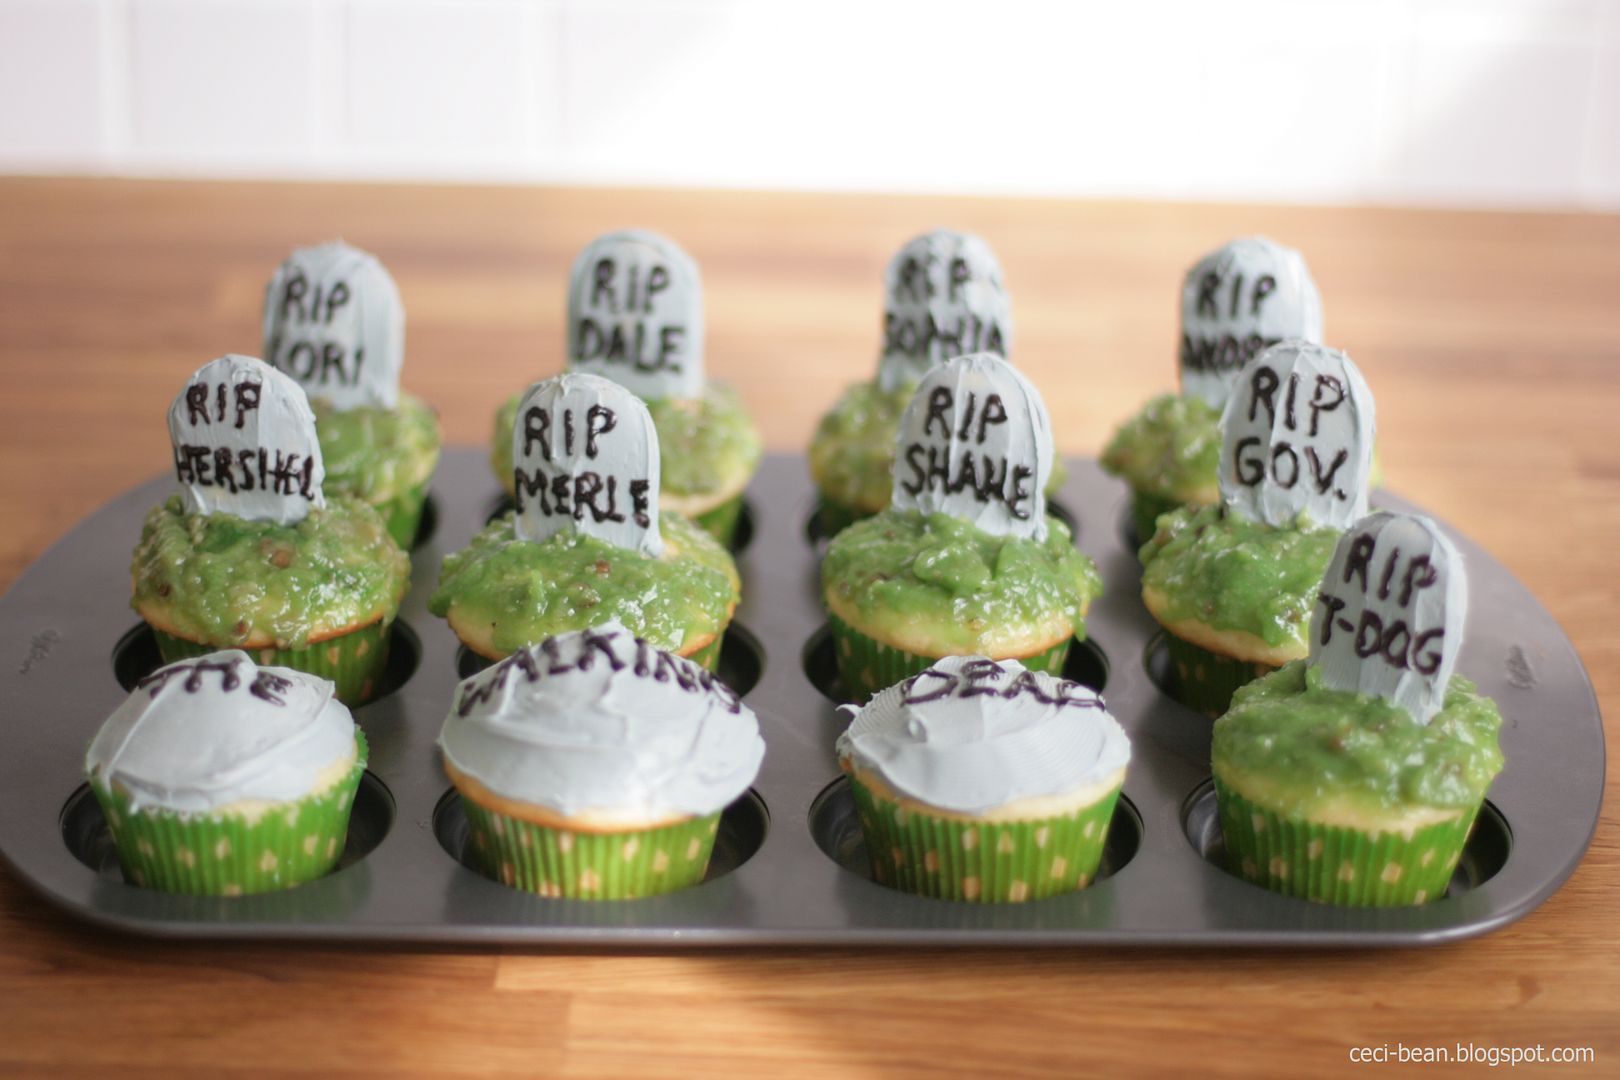
It is no secret that I am totally into The Walking Dead.
If you follow me on Facebook or Instagram, you are probably aware of this.
So it should come as no surprise that I was compelled to make a little something for the season finale. (And what a finale it was! I have so many questions!)
I considered waiting until October to share this since it's unlikely anyone will be throwing parties which require tombstone cupcakes before then, but hey, you know know. I won't judge.
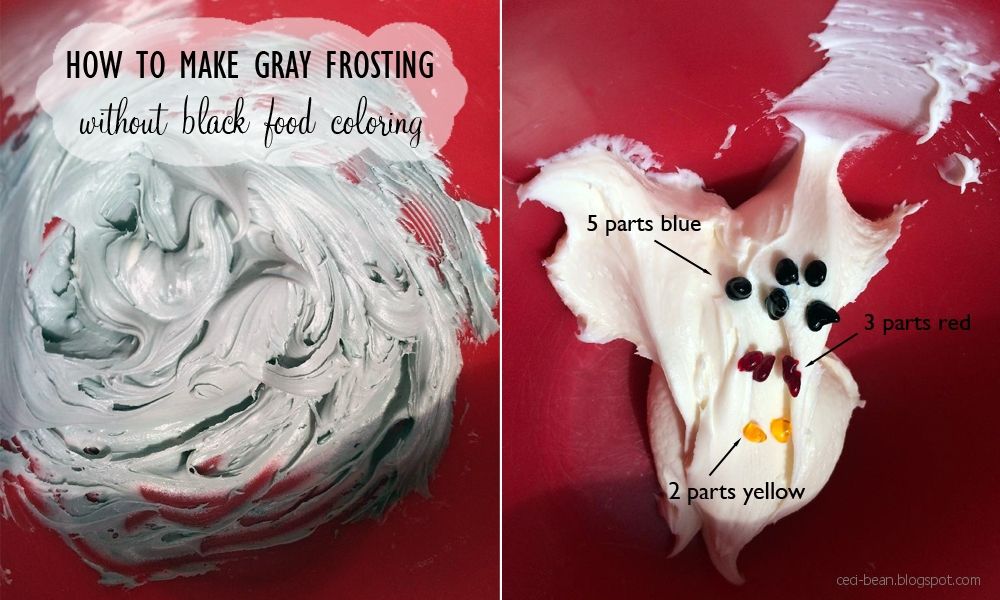
For the tombstones, I frosted Milano cookies with gray frosting. My store didn't have black food coloring, and I was doubtful that red, yellow, blue, and green could make gray. But it did! I tried out a few recommended mixes that I found on the interwebs, and this was the winning combo for me:
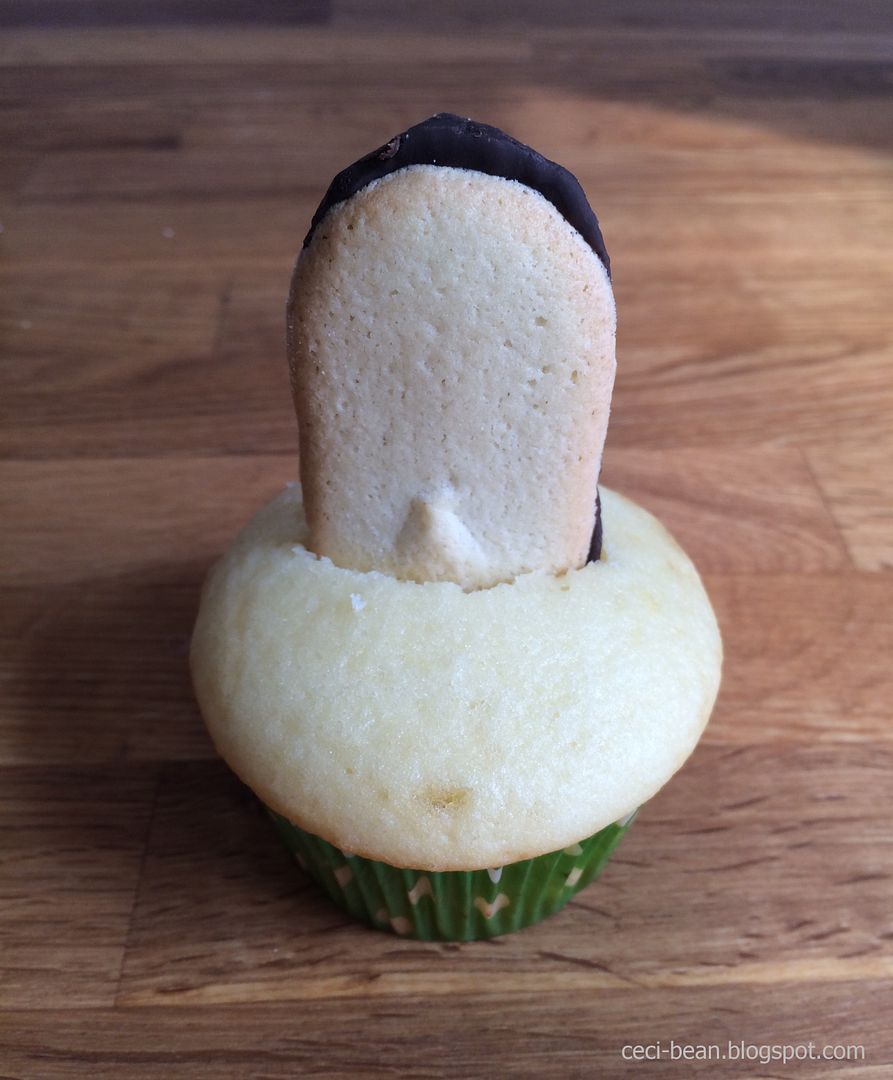
I frosted the top 2/3 of each cookie, front and back, before I stuck it back into the cupcake. I used a knife to gently pushed down on the top of the cookie without messing up the frosting.
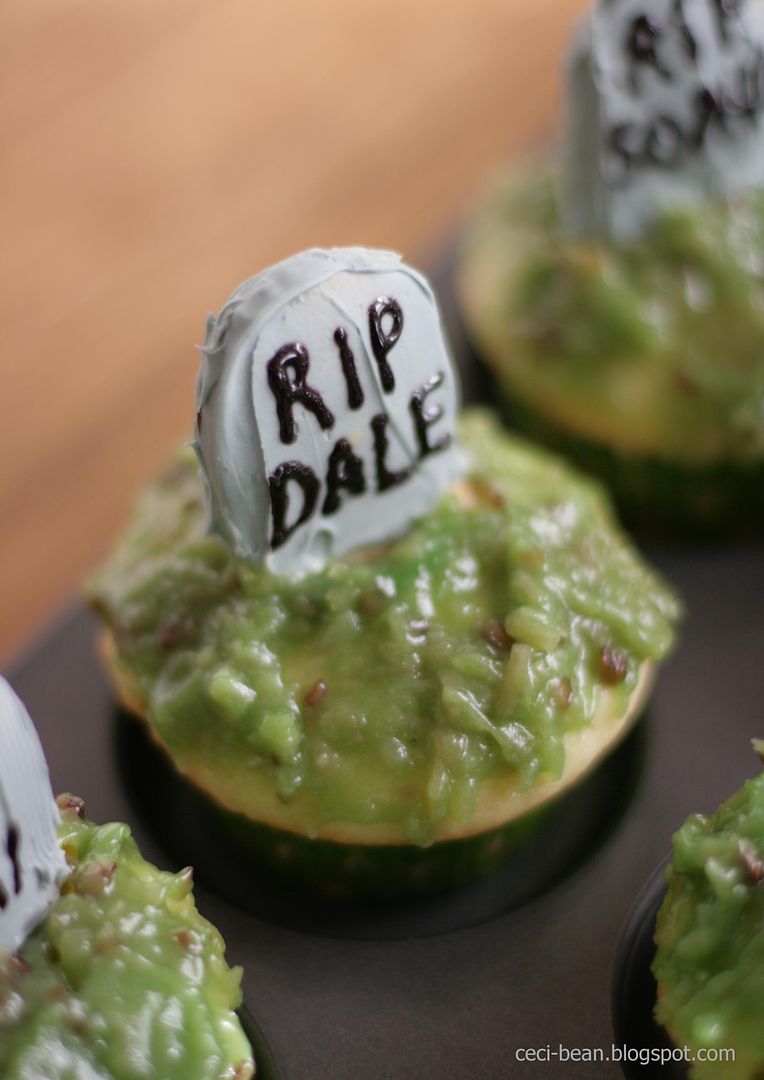
I think they turned out pretty cute! I'll be working on applying smooth frosting while I wait for season 5 to begin...
Monday, January 27, 2014
Ombre Heart Wreath
I had an impulse to craft something cute for Valentine's Day (despite the fact we don't really celebrate it) and I didn't want to spend any money (I feel like that is how all of my craft projects begin). I thought a little wreath of some sort might be fun and easy.
First, I rummaged through our recycling bin for some cardboard and packing paper. You could also go the styrofoam wreath route, if dumpster crafting is not for you!
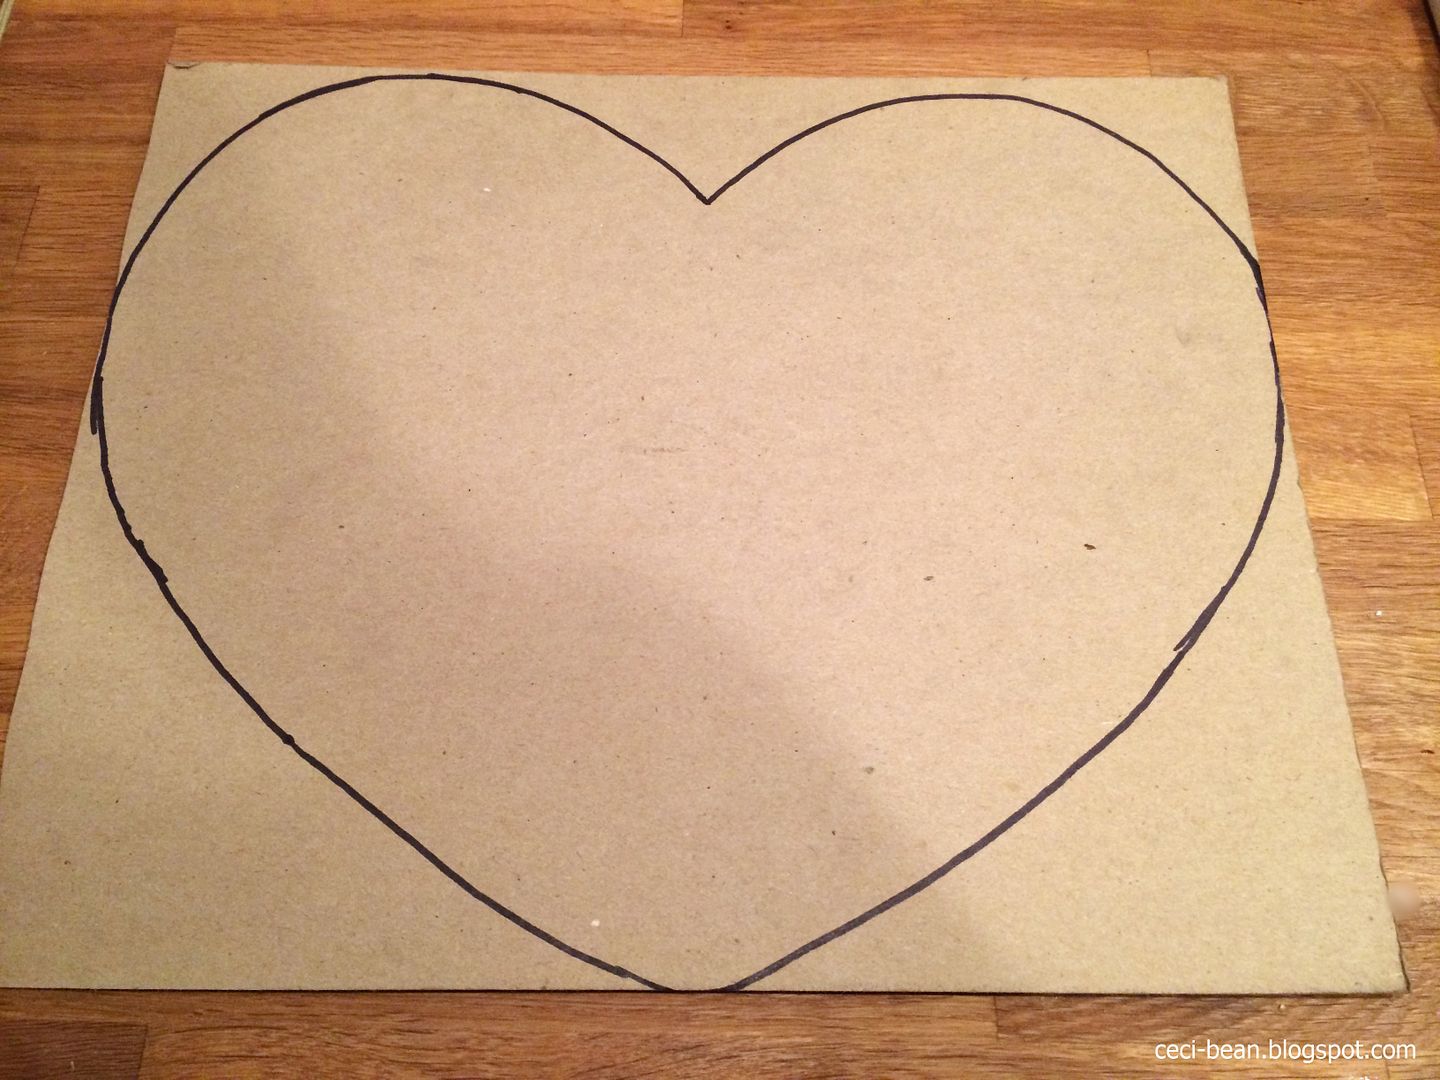
I traced out the largest heart I could fit.
Then I drew a smaller heart inside, and cut it out.
Then I rolled up scrap kraft paper (newspaper would work well too!) and wrapped tape around it. This was to give the wreath some dimension. It looks pretty rough at this stage, but once the yarn is on, it isn't so lumpy and uneven.
I went through the yarn I had on hand and picked some colors that might work well together.
Then I just started wrapped yarn around the wreath, trying to put even amounts of each color on either side.
So simple, and the price is right for a piece of decor which will only be up for a short while.
Also, did you see my Chalkboard Valentine on Instagram?
Linking up to the CSI Project Valentine's Day Linky Party.
Monday, December 9, 2013
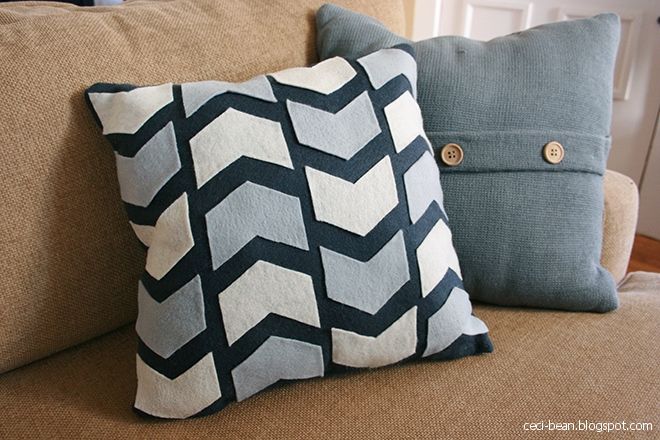
Super Easy Felt Pillow
I am not even going to call this a tutorial. Because who needs one anyway?
1. Cut felt into 2 pieces slightly bigger than a pillow. (Hot tip: Use a pillow case for reference!)
2.
3. Turn inside out. (Hot tip: cut down the corners at a diagonal to reduce bunching when you turn it inside out!)
4. Cut out smaller pieces of felt. (Hot tip: pin felt to paper in the shape you want before you cut!)
4.
5. Stuff big felt with pillow stuffing. (Hot tip: I've heard you can use plastic bags for this, but I've never tried!)
6.
Let's just call this post a friendly reminder of an easy crafty project that would make a nice gift for someone.
Linking up to Dare to DIY.
Casual Christmas Tablescape
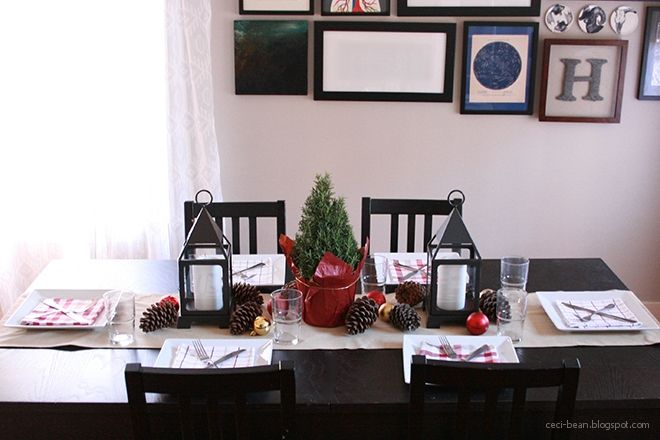
We won't be hosting Christmas this year, but I thought it would be fun to put together a festive little table setting for a casual dinner with some friends.
I had picked up a couple packs of these red, white, and tan dish towels on clearance at Target earlier in the year. The price was right and they fit the laid back feel of our dinner.
I used lanterns and ornaments I had on hand, along with a little rosemary tree (like the one I used on the mantel) and pine cones from the yard. The runner was a scrap of fabric leftover from when we recovered our headboard in the bedroom, but the fabric had been a tablecloth in its former life so it seemed appropriate to use it for this project. Circle of life and all that.
| Please disregard the big blank frame on the wall in the back. One of these days I'll put the picture in there. |
Linking up to Christmas Ideas with Songbird.
Sunday, December 8, 2013
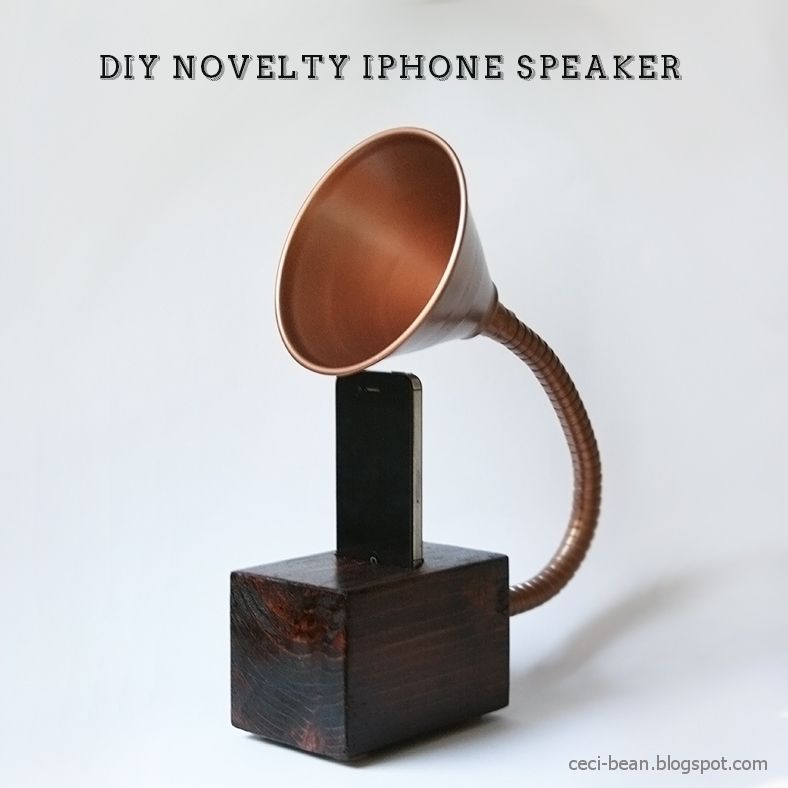
DIY Gramophone iPhone Speaker
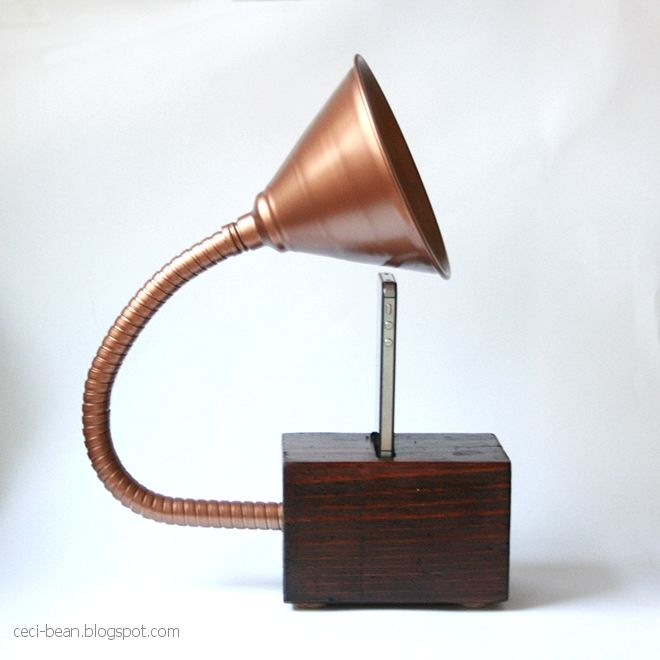
Have you seen those gramophone speakers for iPhones at places like Restoration Hardware and Pottery Barn? I think they are just the coolest things. Super sculptural and they actually work! I really wanted to recreate one, but I could not figure out where to find a horn that was a reasonable price.
So I started thinking about what else I could use to recreate this. And then I realized, a funnel might do the trick! I picked up a galvanized steel funnel with a flexible tube (like this one) at my local automotive shop. I sprayed the funnel with a bronze spray paint to fancy it up a little.
While the paint was drying, I explained to B how I imagined the base would need to be drilled. He went out to the garage and 10 minutes later he had a "prototype" ready to go.
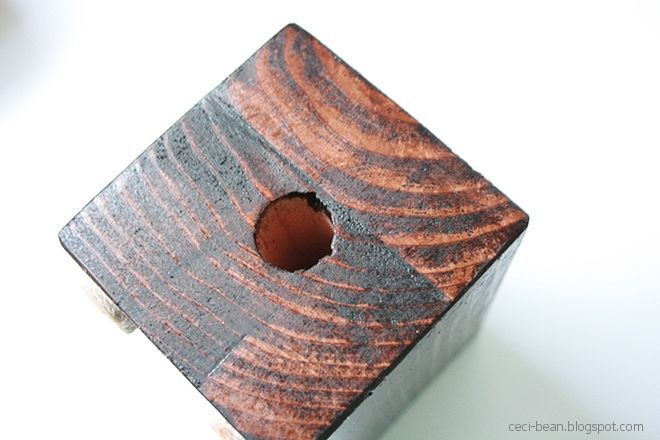
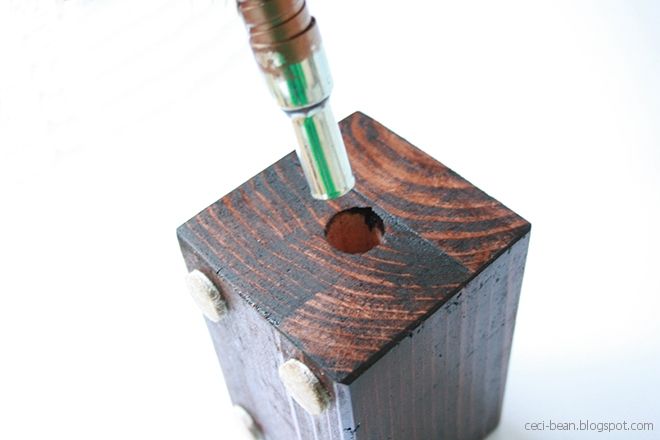
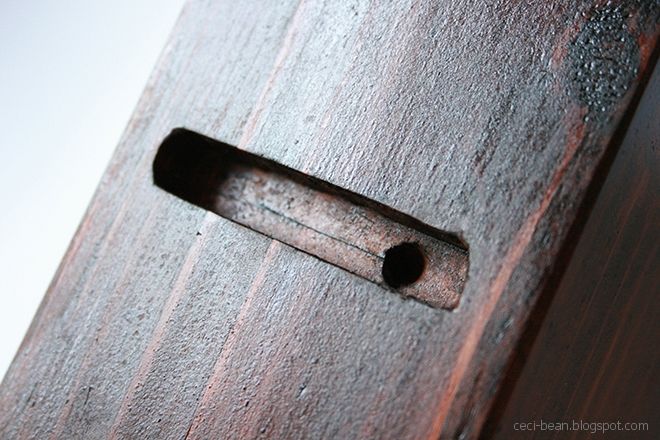
Basically, he used his dremel with a 3/4" spade bit to bore a hole into the back of the base (a piece of Redwood 4x4, approximately 6" long), about half the depth of the base.
Then, he marked out on the top of the base where the iPhone would sit. (It should be situated over the end of the hole you just made for the funnel)
Then using the dremel with a router bit, he cut away the section where the iphone would sit, which positioned the opening under the iphone speaker.
We sanded and stained the base (Mission Oak
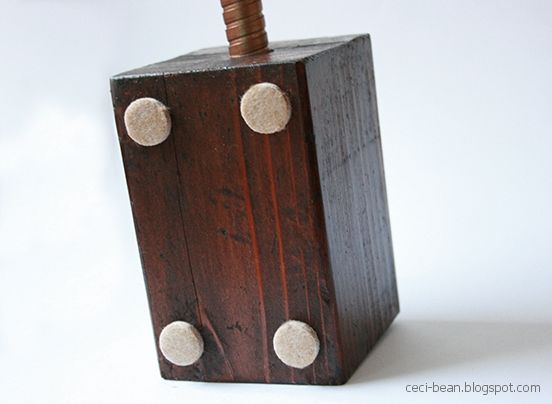
As a last step, we added little felt feet to the base and put the funnel tube into the hole.
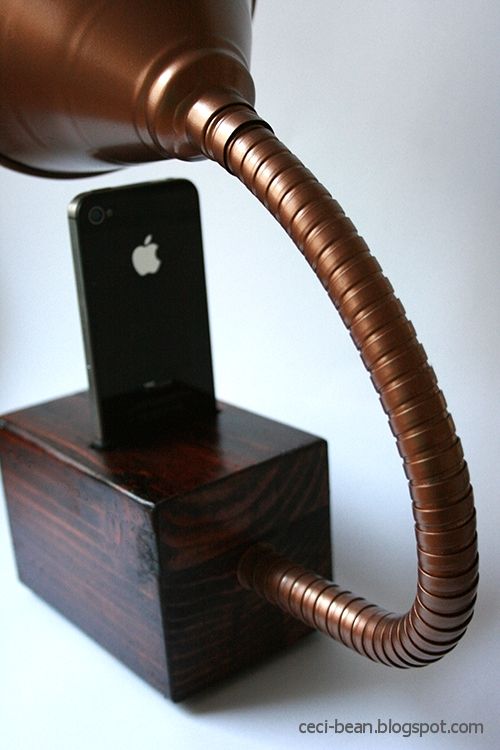
Ta-da! A gramophone inspired passive speaker for the iphone!
We popped the phone in the base, turned on iTunes, and the sounds started coming out of the funnel!
It was pretty cool. Ultimately, the sound was not as amplified as much as I'd hoped, which is why I named this a "novelty" speaker. I mean, it won't replace your Bose sound system or anything, but you can bend the funnel to project the sound in different directions.
I think this could be a great Christmas gift for a music-loving friend. The materials are under $10 bucks (wood, funnel) and you can paint or stain with whatever you've got on hand!
So that's it. Pretty and pretty unique. Do you have anyone on your list who you'd make this for?
Linking up to Dare to DIY.
Saturday, December 7, 2013
Green and Gold Christmas Mantel
When I started thinking about what to put on my mantel this year for Christmas, it was warm and sunny outside. It still felt like fall.
So now that it is nearly at record low temperatures in the Bay Area (there are rumors of snow in San Francisco!), I'm looking at my mantel and wondering if it is really Christmasy enough, despite the ornaments.
Eh, I think it'll do. This coldness can't last forever, right?
This was the first wreath I've ever made and I like how it turned out! I trimmed branches from the hedge in our yard, and tied them to the other half of the embroidery hoop I had floating around the house ever since I made the captain's mirror. I'm sure it is even prettier to me since it was essentially free, right? Ha!
And the chalkboard is contact paper on the picture frame. I decided not to use the chalkboard spray on this because a) it's too freaking cold out to spray anything and b) now it won't be permanent!
The ornament garland if leftover from last year's mantel(s) and the three panels on the wall are pieces of wrapping paper (I think?) from World Market.
So that's my
Linking up to Link Party Palooza with Tatertots & Jello, Holiday Cheer in the Blogosphere with Our Fifth House, All Things Christmas with Happy Hands at Home, Remodelaholics Anonymous with Remodelaholic, Christmas Ideas with Songbird, Dare to Deck the Halls, and Thrifty Decor Chick's Christmas Tree Party.
Tuesday, November 26, 2013
DIY Mini Chalkboard Place Cards
I wanted to share a little more of the process for the chalboard place cards I made for my Thanksgiving tablescape yesterday, in case you'd like to make them too. I know you can purchase little easels pre-made, but doing a little work yourself can make this project way more affordable. I purchase 3 of the 1/4" square basswood sticks (24" long) and one sheet of 1/8" thick x 3" wide x 24" long basswood.
I began by cutting the sheet of basswood into 6 pieces at 4" lengths. I didn't need more than an exacto blade to do this.
Then I cut the sticks into 4" lengths with one straight edge and one angled edge.
| This is the way I made all of my cuts for the stick. Not to scale, obviously. |
For 1/3 of the sticks, I cut them each about 3/4" shorter than the rest. These would be the legs that allowed the chalkboards to tilt back a bit.
Next, I taped off the edged of the fronts of the chalkboards and then gave them two light coats of chalkboard paint.
Once they dried, I peeled off the tape and touched up any spots where the black paint bled onto the gold.
Then I hot glued two legs to the back of each chalkboard.
And finally, I wedged the last shorter legs into the space between the two glued pieces. I opted not to glue these into position permanently so that it would be easy to store these away between uses.
And that's it. Pretty simple, right? And such a cute detail for your dining companions!
Subscribe to:
Posts (Atom)