Showing posts with label food. Show all posts

Wednesday, June 22, 2016

Travel Snack Pack for Toddlers

This post contains affiliate links for products mentioned.

In preparation for an upcoming family trip across the country (wish us luck!), I've been looking for ways to make travel easier on Sebastian. Since mealtimes can be tricky even in the best circumstances, snacks for toddlers are essential to getting through a long and busy day. 

Now when determining what snacks would go in each section, I started with our usual daily snacks (toasted oat cereal, raisins, nuts) and then looked for some new options I could mix in and try out now and see if Sebastian liked them. My nearest grocery store doesn't have a large selection of toddler specific foods, so I headed to Target where they have a large assortment of snacks for little ones. 
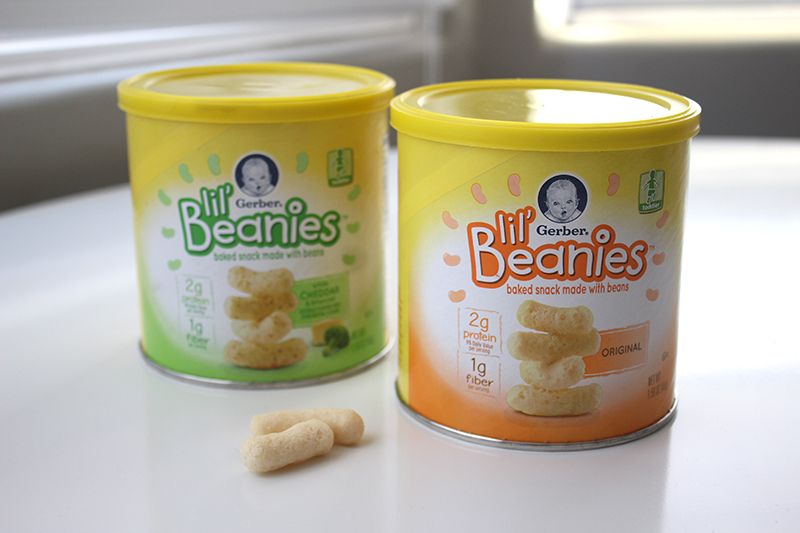

It was there that I spotted Gerber® Lil' Beanies™. I picked up the two flavors they carried (Original and White Cheddar & Broccoli). I was immediately intrigued by the information I saw on the package. Lil' Beanies™ are made from navy beans and each serving delivers 2 grams of protein (9% daily value), 1 gram of fiber, and 10% daily value of Vitamin E. They are baked, not fried, and they are not made from genetically engineered ingredients. I try to serve my kiddo snacks that provide him with nutrients and not just empty calories, so the protein and fiber in these snacks sounded like a good choice. And they certainly looked like something Sebastian would enjoy, so I brought some home for him to try out. 
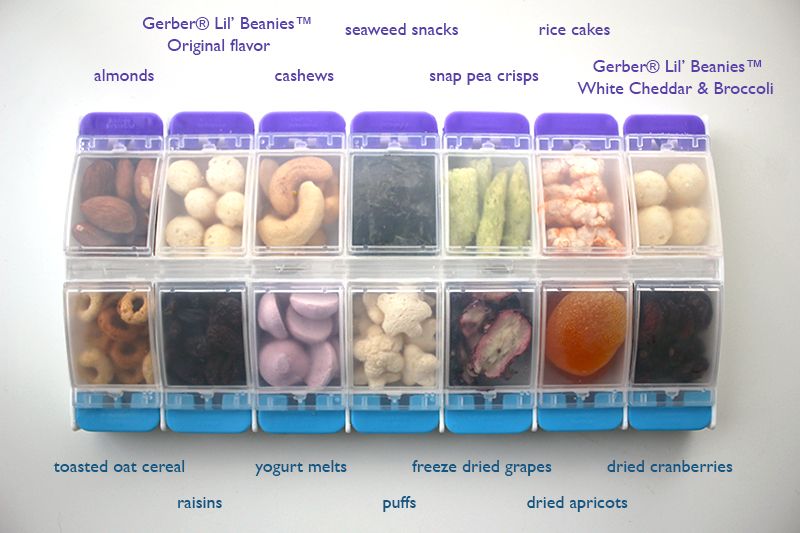
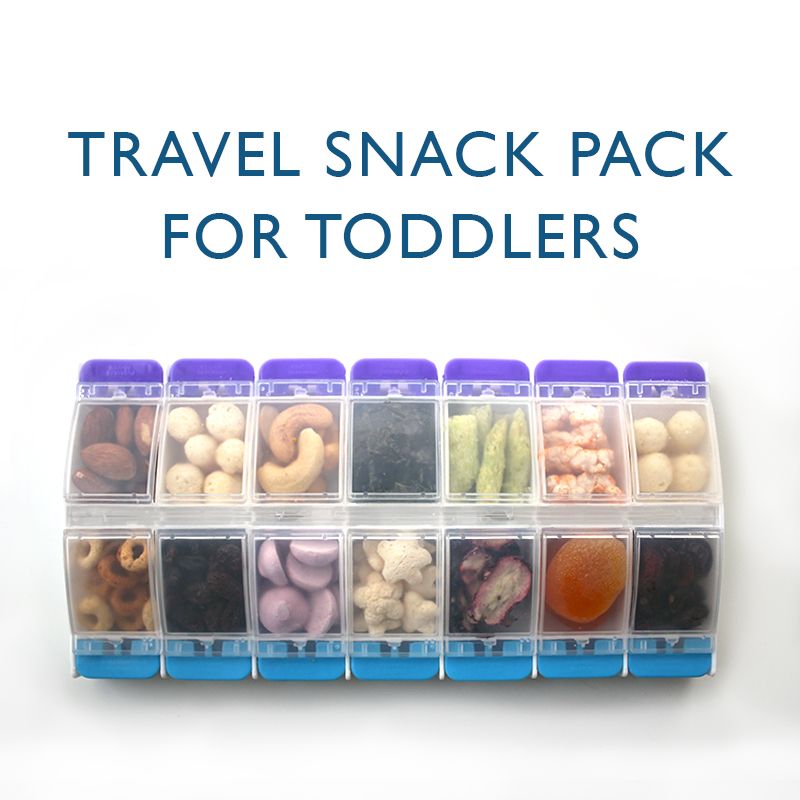
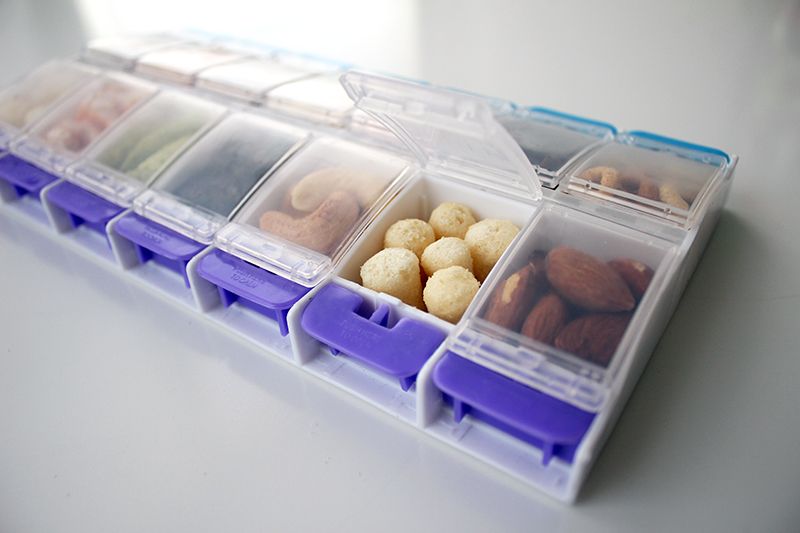
For the snack pack, I wanted to create something that was easy to throw in our carry-on bag that provided a lot of options. I loved the idea of using something with small compartments for several reasons. First, the food stay separate which would help us avoid weird flavor combos like snap pea and raisin. Secondly, it might limit mess making on the plane since the most that could be spilled at once would be one section. And last, what toddler doesn't like to endlessly open and shut tiny doors? It practically does double duty as a toy!

Here is what I included in the snack pack today.


Other items I've included in the pack are banana chips, other freeze dried fruits, and cheddar bunnies. I did not include highly perishable or messy items since we won't be able to refrigerate the food during travel. 

I realize a few of these (the nuts particularly) might not be a good choice for all children. Include what works best for your child and make sure they are seated and supervised when they are eating from the snack pack. You know their readiness for certain foods best.
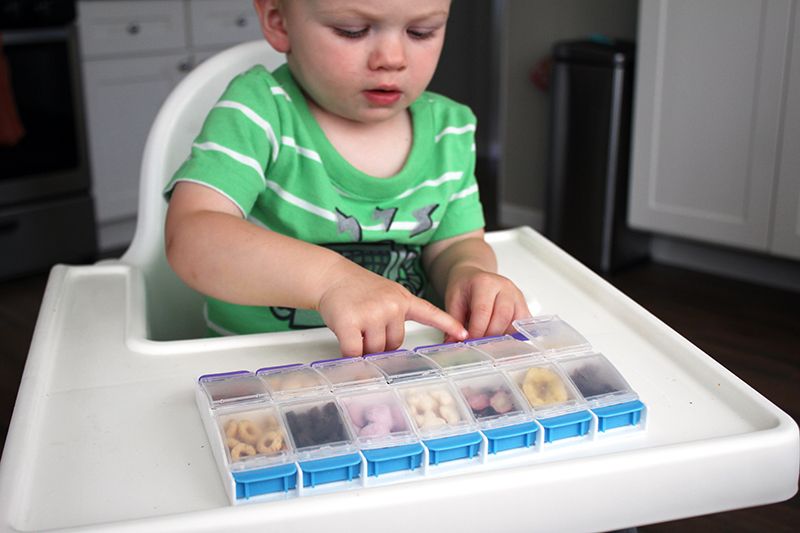
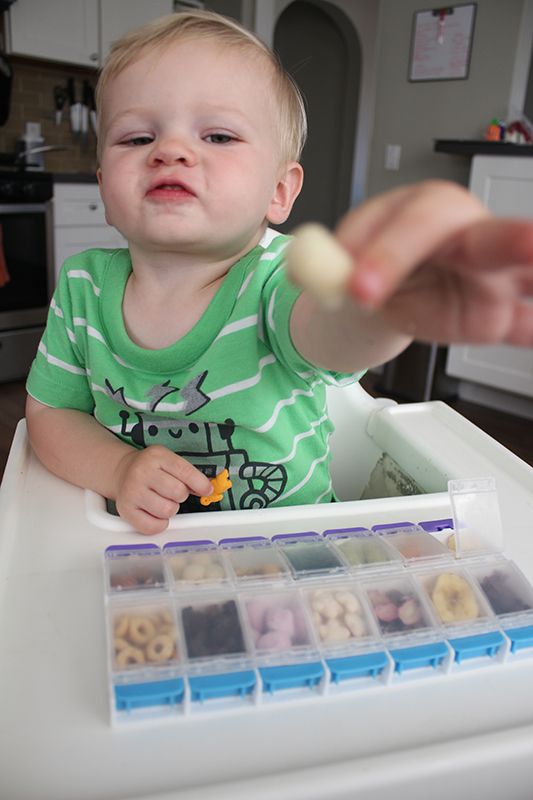
toddler snacks


He enjoyed his Gerber snacks and wanted to share them with his mama too!

We've already taken the pack to the park a couple times and I found it to be a really convenient way to bring a lot of snack options with us without taking up too much space in the bag. And Sebastian was excited to discover new additions to the box. I would call that a #GerberWinWin.

While I'm not the first person to come up with this snack pack, this is my take on it.

I purchased a 14-compartment pill box (similar). Although it made no difference to Sebastian, I wanted it to look a little less pharmaceutical, so I scrubbed off the day labels from each little door with a magic eraser.
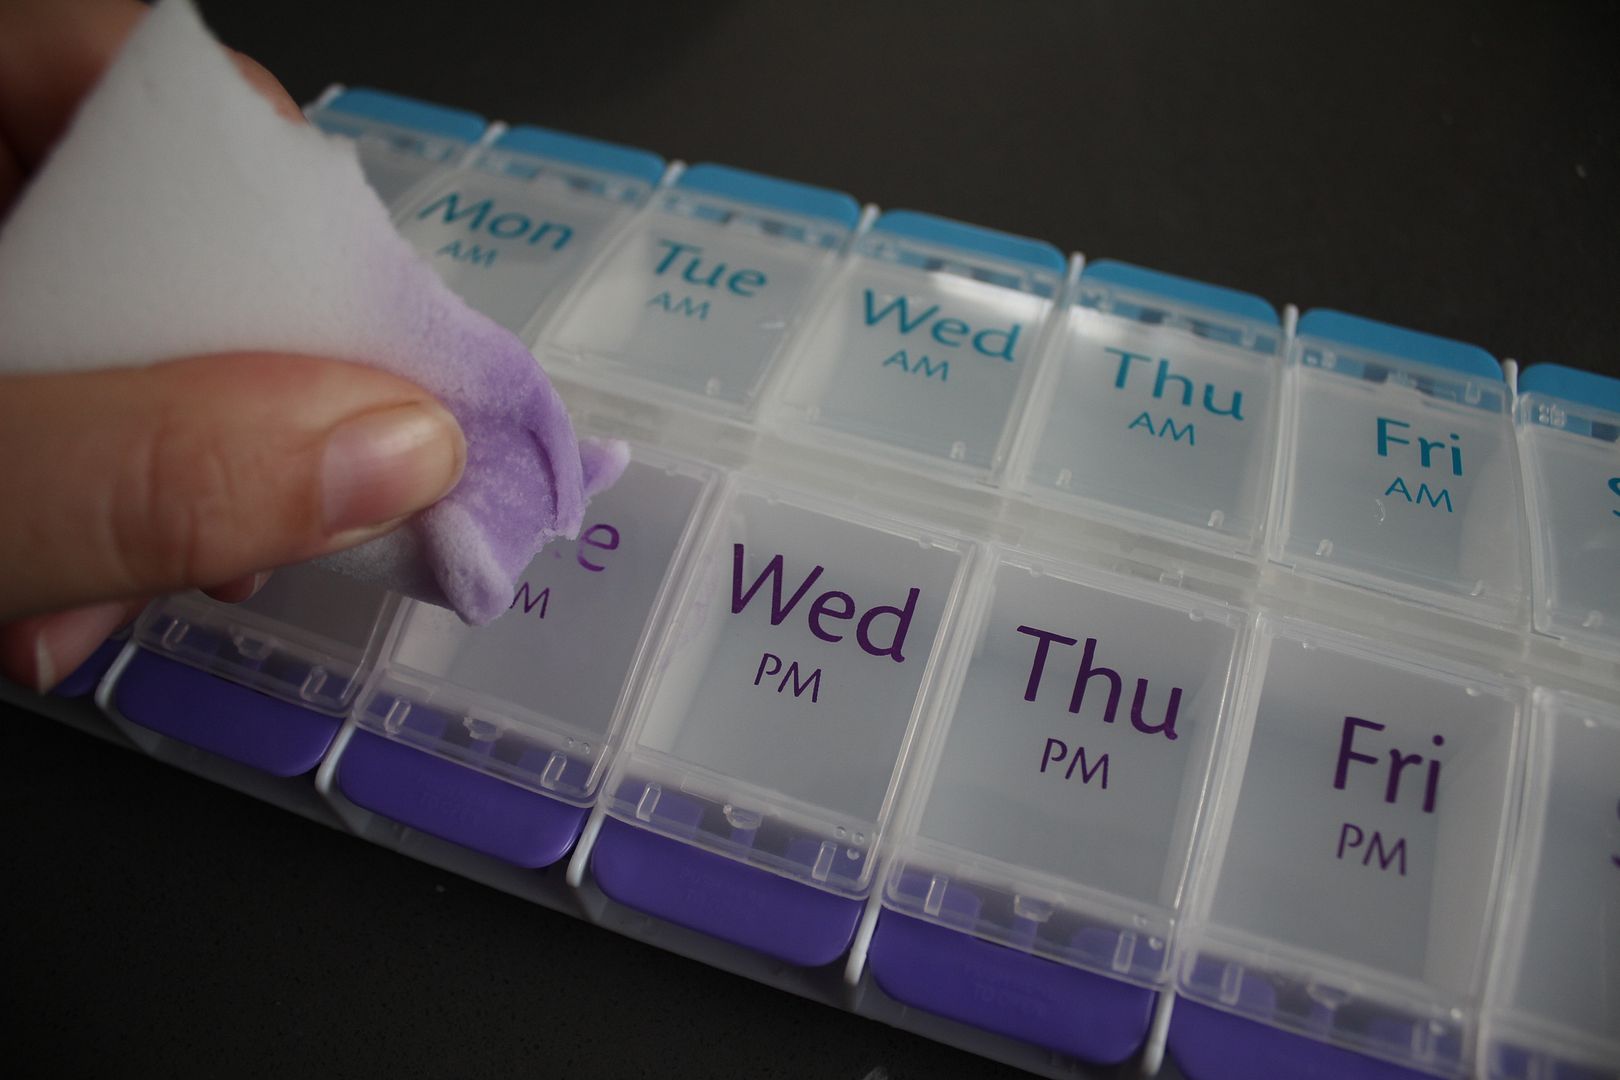

Smaller snacks fit easily and larger ones were cut or broken in half to fit more easily into the compartments. 

I am glad to have mess-free and nutritious snack options all figured out for our trip. It might not eliminate all stress during our long flights, but it's certainly a step in the right direction. A hangry toddler is never an ideal travel companion. 

Oh, and be sure to check out my previous post for a chance to win a Gerber® "Welcome to Toddlerhood" kit!

Many thanks to Gerber® for sponsoring today's story and making it easy to eat healthy on the go!

Tuesday, June 14, 2016

Feeding a Toddler (and Gerber Giveaway)


I have to say, feeding a toddler is a serious challenge.

When we first starting introducing food to Sebastian about a year ago, we were really proud of ourselves for getting him to eat all sorts of healthy foods. He gobbled peas and carrots and sucked down kale purees with glee. This isn't so hard, we thought. Our kid loves vegetables, B and I congratulated ourselves as we high-fived.

Ooh, boy. What newbs!

We clearly didn't know that the real challenge isn't getting a baby to eat things, but to get a toddler to eat things that they suddenly and inexplicably don't like anymore. I shared before what I do with leftover bananas when they fall out of grace here. But now I want to talk about how we make sure our eighteen month old kiddo gets all the nutrients he needs, even on days when he isn't interested in eating much of anything.


Mostly we try to serve Seb some of whatever we're eating for our meal, and supplement with his favorite fruits and veggies. Our go-to's right now are roasted sweet potatoes, applesauce, blueberries, raisins, and grapes. Sometimes, that works! Other times, he is only interested in squishing food around and throwing it on the floor. While we try to discourage the mess making, we also know trying to force a toddler to eat his dinner is a lost cause.

We recently were introduced to Gerber® Good Start® Grow Toddler Drink. It is formulated for toddlers like our kiddo to fill in the nutrition gaps caused by incomplete (ahem, rejected) meals. Of course, our first approach will always be to offer wholesome food, but on those days when our meals falls a bit short, it is nice to know there is an option that he will readily accept. 


It mixes easily with water and Sebastian happily gulped it down the first time we offered it to him, so it must be pretty tasty! It is not intended to be a meal replacement, but rather a supplement to a healthy diet. Gerber® Good Start® Grow Toddler Drink includes probiotics, Iron, Vitamin C, D, and E, Potassium, and DHA. It is also GMO free, which I think a lot of moms would feel good about when feeding their toddlers. #formulaforhappiness


Now the fun part! In partnership with Gerber®, Ceci Bean readers have a chance to win a "Welcome to Toddlerhood" kit which will include a sample of this product for your family to try and other surprise goodies! Open to U.S. residents only.

a Rafflecopter giveaway If you have any best practices for getting picky toddlers to eat or if you've tried Gerber® Grow Start® for your child, please share in the comments!


Wednesday, May 25, 2016

Strawberry Frozen Custard with a2 Milk®

This post brought to you by The a2 Milk Company™. The content and opinions expressed below are that of Ceci Bean.

The stars really aligned in our household when we were gifted an ice cream maker around the same time the strawberries in our garden started ripening. It felt like strawberry ice cream was our destiny. 
The first night we tested the ice cream maker, we had no heavy cream in the house. While we could have run to the store to grab some cream, I wanted to see if we could create something delicious with what we had on hand. Thankfully, we had a carton of a2 Milk® which meant that whatever we made could be enjoyed by even the most sensitive stomachs in the family. 

If you aren't yet familiar with a2 Milk®, it is the only dairy product on the market which contains the A2 protein. All other milk (even organic) contains the A1 protein which causes digestive discomfort for many people. Unlike most chemically processed milk alternatives, a2 Milk® is a natural replacement to conventional milk. 

Feeling determined to make something sweet and frozen, I started thinking about what could be used to give a rich, creamy texture to frozen milk. 

An ice cream parlor in our neighborhood serves a frozen custard that is really spectacular, so I decided to try out a custard recipe. You guys, it turned out amaaazing. I wouldn't call it health food, but it is hard to believe quite how good it is considering it has no heavy cream in it. This is no consolation recipe. This is a dessert superstar in its own right.

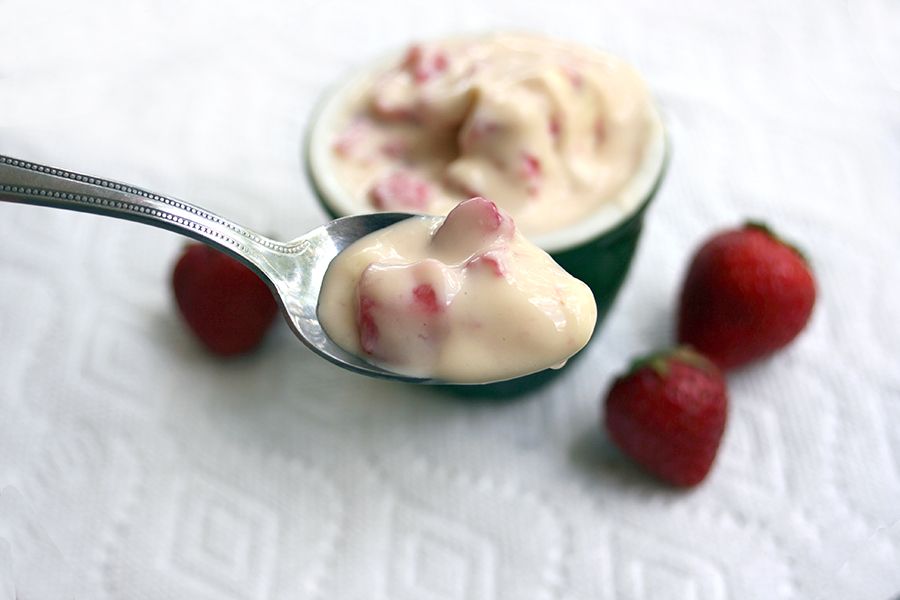
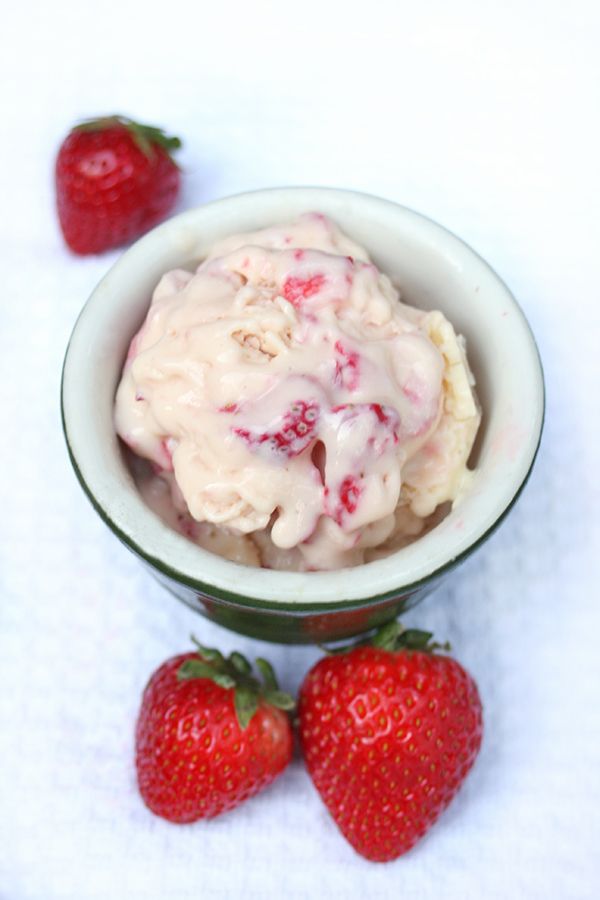
Now, you can probably tell that the custard isn't strawberry pink, but more of a "strawberries 'n' cream" mix. I tried it a few different ways and I found this to be the winning mix. Sweet bits of fresh strawberries poking out of a mountain of decadent vanilla. Ah, so good.

I should note that the ice cream maker we used is a Zoku, which means we mixed each serving by hand. If you choose to use an electric ice cream maker, you may need to omit the coursely chopped strawberries or stir them in at the end. Check the manual for your machine to be sure.


Strawberry Frozen Custard (made with a2 Milk®)

Ingredients (for four 1/2 cup servings)

  • 2 cups a2 Milk®
  • 4 egg yolks
  • 1/4 cup plus 1 Tbsp granulated sugar
  • 1 pint fresh strawberries
  • 1 Tbsp cornstarch
  • 2 tsp vanilla extract

Instructions

  1. Hull the strawberries and chop 1/3 of them coursely and puree or mince the remaining 2/3 (I should note that once again, I did this by hand though you can totally use a food processor if it makes your life easier!) and transfer all to a small bowl.
  2. Stir in 1 Tbsp of sugar and allow to stand for at least 30 minutes. 
  3. Pour the a2 Milk® into a medium saucepan and heat on medium heat until simmering.
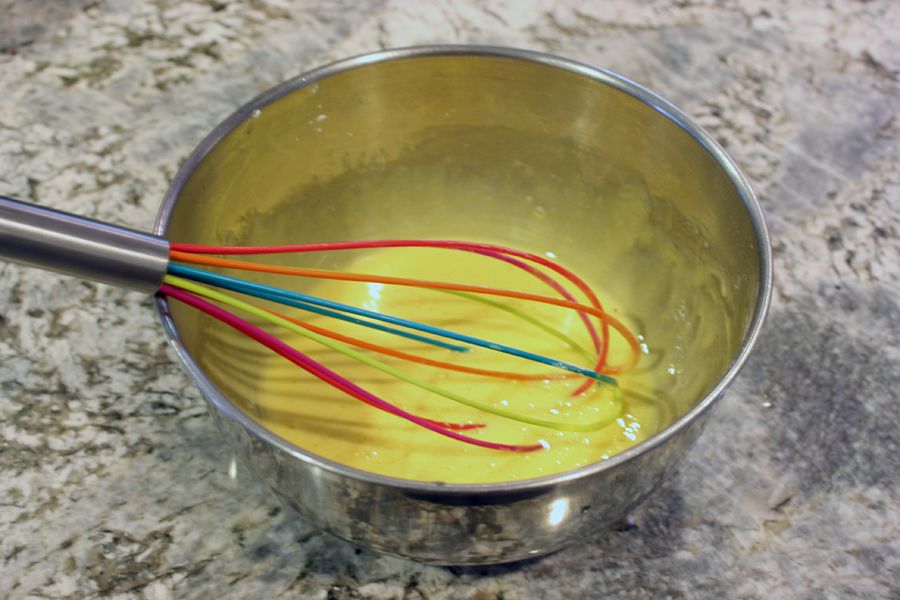
  4. While milk is heating, put egg yolks in a bowl and whisk until frothy. 
  5. Add sugar, cornstarch, and vanilla extract to the bowl of egg yolks and whisk until mixture is thick and light yellow.
  6. When milk is simmering, slowly pour egg yolk mixture into the saucepan, whisking continuously.
  7. Turn heat to low and stir mixture for about 5 minutes or until it has thickened enough to coat a spoon.
  8. Transfer to a bowl and cool thoroughly in refrigerator. 
  9. Once cool, mix in strawberries and transfer mixture to ice cream maker.
  10. Freeze mixture according to manufacturer's instructions.
  11. Enjoy as soft-serve or transfer to a container and place in the freezer to harden.

If you'd like to try a2 Milk® for yourself, grab this a2 Milk® $1 Off Coupon and check the Product Locator to see which grocery stores near you are carrying it. 

For more information on the a2 Milk Company™ as well as other delicious recipes, check them out on Facebook, Twitter, or Pinterest.
Visit Sponsors Site

Monday, April 25, 2016

Honeydew Bubble Tea with a2 Milk®

This post brought to you by The a2 Milk Company™. It also contains affiliate links for some of the products shown. The content and opinions expressed below are that of Ceci Bean.


I have to be honest. This recipe is a little self-serving.

First of all, if you don't crave bubble tea to the extent that I do, it may not feel worth it to make all of these components. I mean, I had to plan ahead for this one. There are no giant tapioca balls available in my neighborhood grocery store, for example. Or giant straws which, let's face it, are pretty essential to the enjoyment of bubble tea.

Also, there are tons of ways to make bubble tea. You can certainly find a recipe out there that includes other types of dairy or even powdered tea mix. That exists and you can try it. But this recipe, while not light on sweetener, uses fresh a2 Milk®, brewed tea, and real honeydew juice. Why a2 Milk®? Well, because then you can serve this treat to your guests at your shindigs this summer without fear that you'll be giving them an aching belly. a2 Milk® is the natural replacement to chemically processed alternatives to milk for those who experience digestive issues from regular milk. It is also hormone and antibiotic free and contains no artificial ingredients or additives. It's the good stuff, folks.

Lastly, I wrote this recipe to be quiet. Oh, that isn't important to everyone? We don't all want to make delicious beverages to enjoy while our toddlers nap without the fear of waking them up? Well, if this is not a concern to you, you might as well use a blender or some loud machine that will juice your fresh honeydew for you. As for me, I'm over here mashing melons with a potato masher all Amish-style because shhhh, let's not wake the kid, for goodness sake! 


Honeydew Bubble Tea (made with a2 Milk®)

Ingredients (for two 12 oz servings)

Instructions

  1. If you don't have simple syrup, combine sugar and water in a small saucepan. Stir until dissolved, approximately 10 minutes. Allow to cool before transferring to a bottle.
  2. Boil water.
  3. Steep 3 bags of green tea for 3-4 minutes. Remove tea bags and chill tea in refrigerator until ready to use.
  4. Prepare tapioca pearls as directed on the packaging. Combine pearls with 2 tablespoons of simple syrup and set aside until ready to use.
  5. Remove the peel on the honeydew and cut into 2" pieces. 
  6. Transfer to a large bowl and use a potato masher to crush the melon.
  7. Pour melon through a fine mesh strainer. Discard pulp.
  8. Mix remaining simple syrup with 3/4 cup of honeydew juice.
  9. Spoon tapioca pearls into serving glasses. 
  10. Pour 1/2 cup milk, 1/2 cup iced tea, and 1/2 cup honeydew mixture into serving glasses.
  11. Add ice and straw.
  12. Enjoy!


If you'd like to try a2 Milk® for yourself, grab this a2 Milk® $1 Off Coupon and check the Product Locator to see which grocery stores near you are carrying it. 
For more information on the a2 Milk Company™ as well as other delicious recipes, check them out on Facebook, Twitter, or Pinterest.


Saturday, March 26, 2016

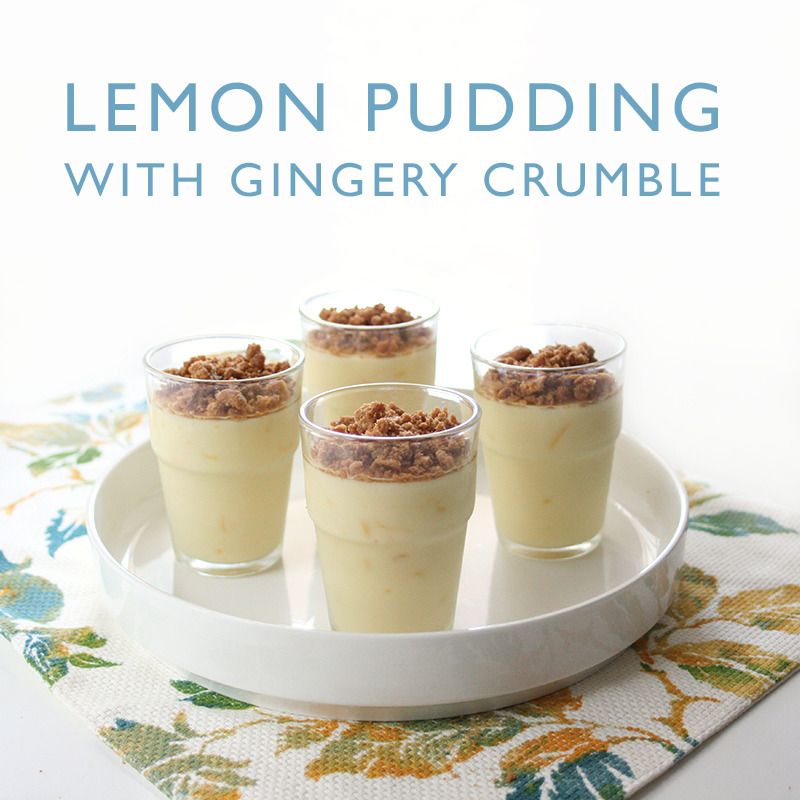
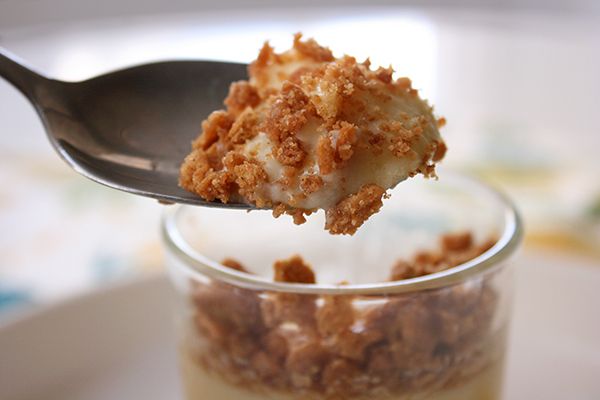
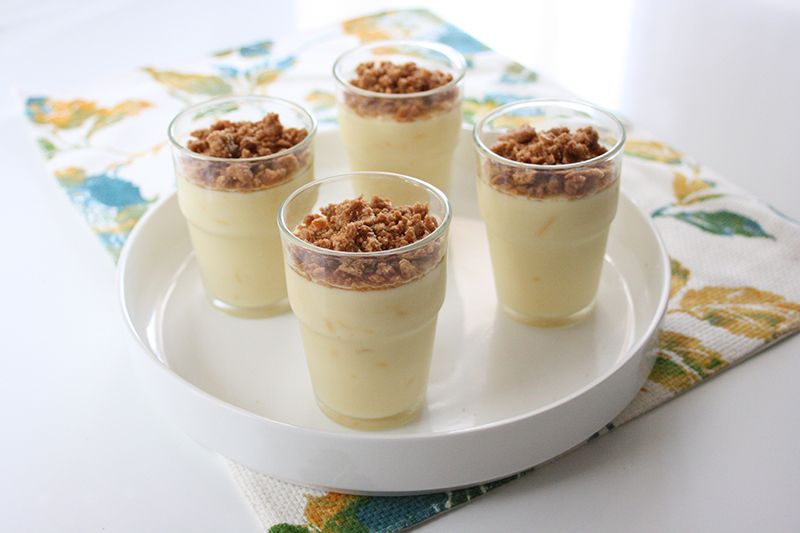
Lemon Pudding with Gingery Crumble Made with a2 Milk®

This post brought to you by The a2 Milk Company™. The content and opinions expressed below are that of Ceci Bean.

My son has started a daily ritual of walking up to the lemon tree in our front yard and demanding, in his limited vocabulary, to be given a lemon. Or a ball, as he calls most everything. His insistence is cute so naturally I pick one for him and off he goes to look at bugs and splash in puddles, lemon in hand. Those lemons that haven't been destroyed during his adventures end up in our fruit bowl at the end of the day. And as you can imagine, we now have a mountain of lemons that need to be used.

Now our lemons are not the popular Meyer variety that are more sweet than sour (though those are pretty wonderful in their own right). Ours are the mouth puckering sour lemons that need a creamy milk and a bit of sugar to mellow out. Add to that a crunchy slightly spicy cookie crumble and you've got a pretty fantastic (and easy!) treat to enjoy. While I think true ginger snaps would really pair well with the tangy lemon, this crumble topping works pretty darn well in a pinch. And this recipe makes quite a bit more topping than you might need for the pudding. But once you taste it, I doubt you'll have much difficulty finding ways to use it up.


It was an easy decision to incorporate a2 Milk® into this recipe without fear of serving it to guests who couldn't eat much dairy. I've had the opportunity to try a2 Milk® a few times now and I have to say it does seem pretty gentle on my stomach too. If you have any concerns about digestive discomfort from dairy, you may choose to omit the butter in this pudding recipe and stick with milk which contains only A2 proteins. Similarly, you can use coconut oil for the crumble topping in place of butter. 


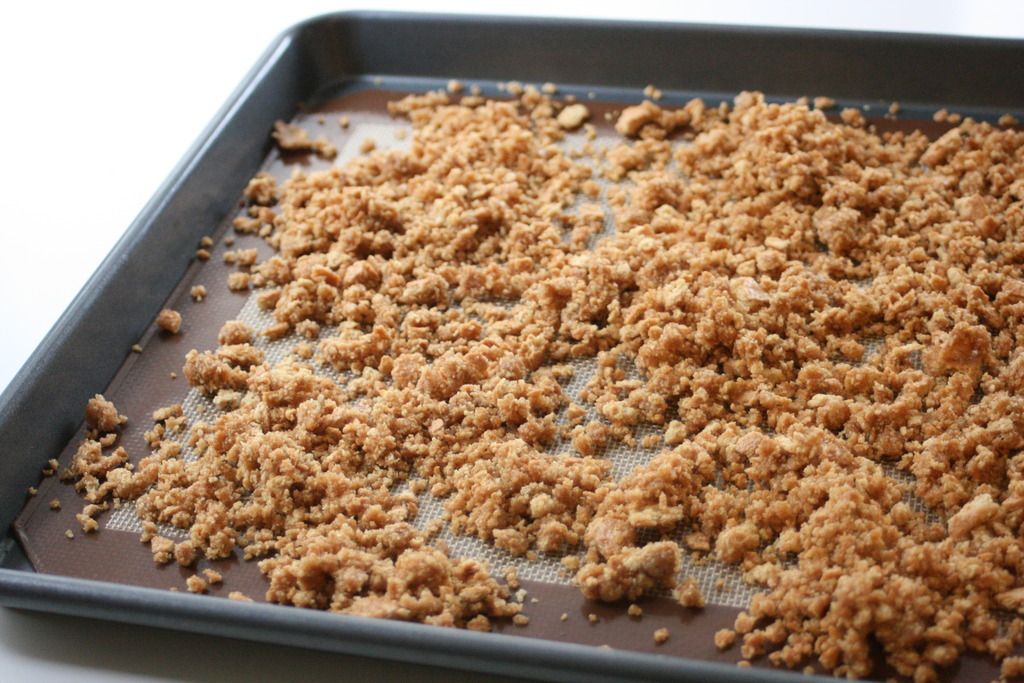
Gingery Crumble Topping

Ingredients

  • 1 sleeve of graham crackers
  • 6 Tbsp of melted unsalted butter (or coconut oil)
  • 1/4 cup light brown sugar
  • 1 tsp of ground ginger
  • 1/4 tsp of ground cinnamon

Instructions

  1. Preheat oven to 325ºF.
  2. Crumble graham crackers in package and pour into a bowl.
  3. Mix in butter (or coconut oil) and spices.
  4. Spread crumble mixture on a lined baking sheet and bake until golden brown (about 10-12 minutes).
  5. Let cool and store in a sealed container until ready to top pudding.

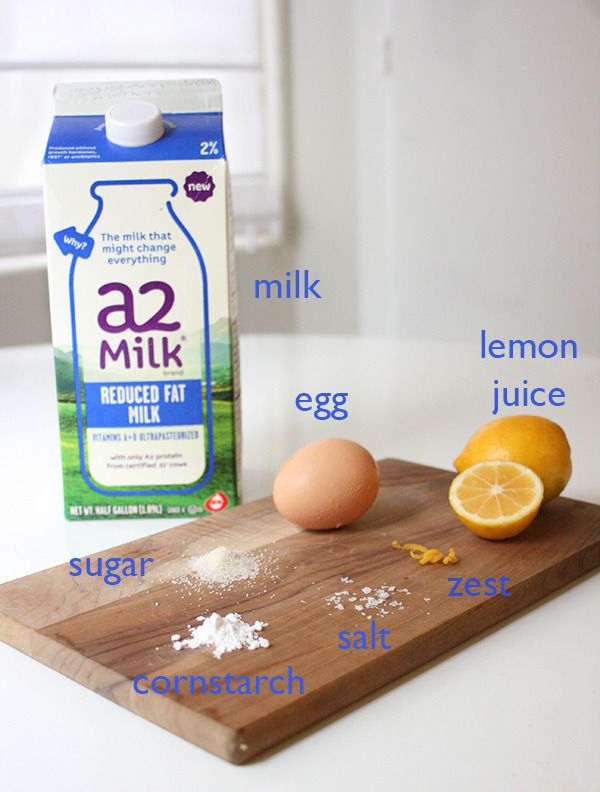
Lemon Pudding (made with a2 Milk®)

Ingredients

  • 2 1/2 cups a2 Milk®
  • 1/2 cup granulated sugar (less if you want a tarter pudding)
  • 1/4 cup of cornstarch
  • 3 - 4 medium lemons juiced (approx. 1/2 cup)
  • 3 - 4 medium lemons finely zested (approx. 2 Tbsp)
  • 3 egg yolks (lightly whisked)
  • 1/2 tsp vanilla extract
  • pinch of salt
  • 2 Tbsp melted butter (optional)

Instructions

  1. In a medium saucepan, combine together sugar and cornstarch thoroughly.
  2. Stir in milk and turn on stove to medium heat.
  3. Add egg yolks, lemon zest, vanilla, and salt.
  4. Stir continually until mixture has thickened (approx 5-8 minutes)
  5. Remove from heat and add lemon juice (and butter, for extra creaminess, if you wish).
  6. Pour in glasses and let cool.
  7. Chill in the refrigerator for at least 2 hours before serving. 
  8. Enjoy!

If you'd like to try a2 Milk® for yourself, grab this a2 Milk® $1 Off Coupon and check the Product Locator to see which grocery stores near you are carrying it. 

For more information on the a2 Milk Company™ as well as other delicious recipes, check them out on Facebook, Twitter, or Pinterest.
Visit Sponsors Site

Wednesday, February 24, 2016

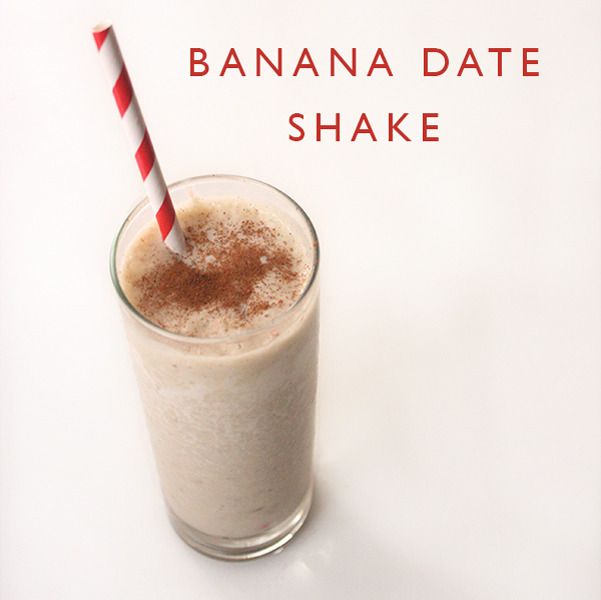
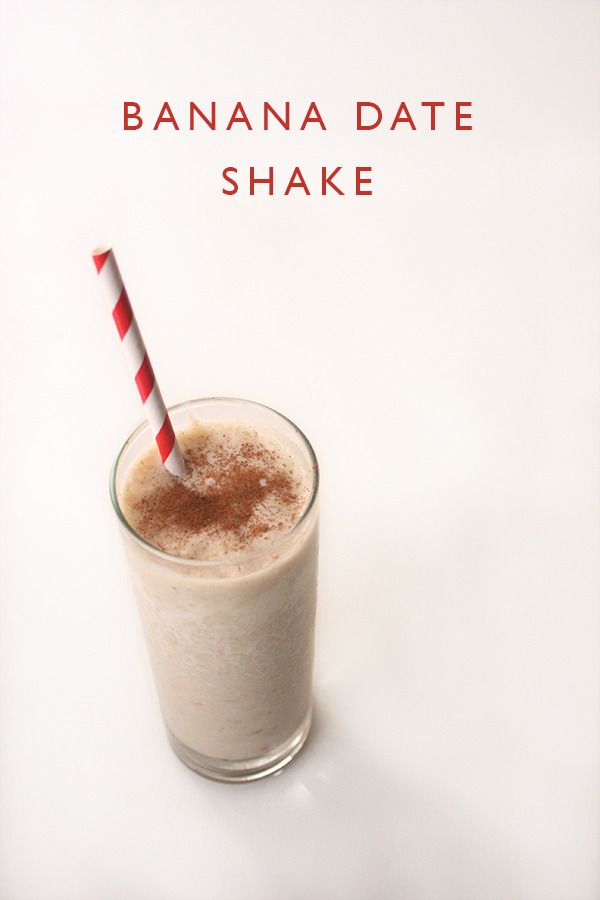
Banana Date Shake with a2 Milk®

This post brought to you by The a2 Milk Company™. The content and opinions expressed below are that of Ceci Bean.

When Sebastian turned one year old, we slowly started introducing cow's milk into his diet. I had heard that some children don't respond well to the taste, but our kid took to it quickly. And just like that, our family's milk consumption soared.

However, we have friends whose kiddos have had a harder time with dairy (and other foods), so I feel sympathetic to the challenges of finding the best alternative to regular cow's milk. That's why I was interested to try a2 Milk® and learn more about it.

It seems that originally, all milk contained only something known as the A2 protein. Over time a genetic mutation occurred in cows and a new type of protein developed called A1. This A1 protein causes digestive discomfort for some folks and is in all cows’ milk in-stores today, even organic milk. Since a2 Milk® has the A2 protein, there's a good chance that folks (and kids) who have a little trouble digesting regular dairy might be able to enjoy it more easily.

Because I was a little concerned about how the protein was added and what else might be in the milk, I was happy to learn that their cows naturally produce the milk with only the A2 protein. Also, their farmers are certified in the humane treatment of animals, their cows are fed a vegetarian diet and never given hormones or rBST, and the milk is antibiotic free and contains no artificial ingredients or additives.

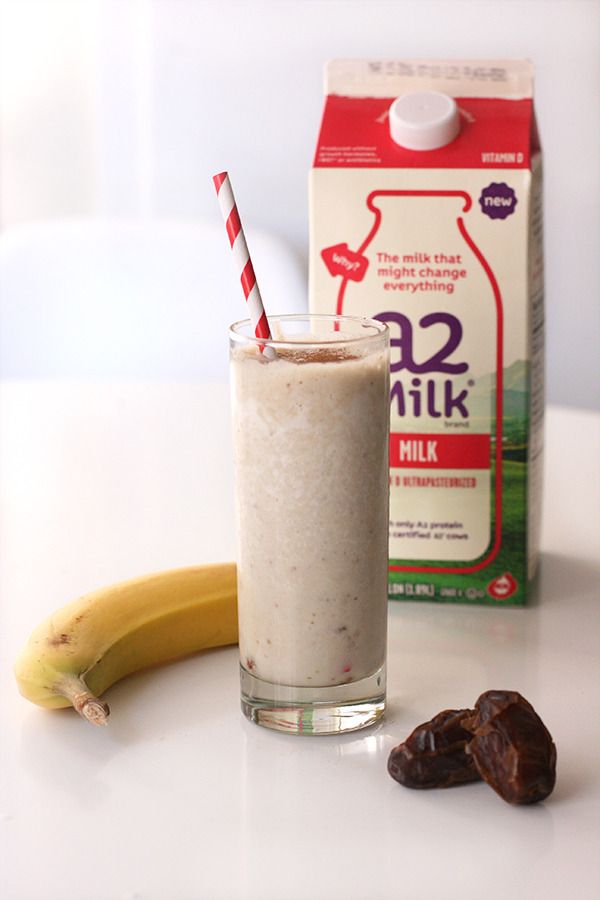
With this information, I was excited to try a2 Milk® in my Banana Date Shake recipe below.

You see, along with milk our kid also goes bananas for bananas. Or at least he does for days at a time and then every now and then decides he wants nothing to do with them. Does your kid do that too? Because of this, I buy large bunches of bananas regularly, but I also have to be ready to find other ways to use them up when Sebastian is not in the mood for them. Since a person can only consume so much banana bread (That's a lie. There is no end to the amount of banana bread I can consume. Om nom nom!), I end up freezing whatever hasn't been eaten at the end of the week. Since this has been going on for some time now, I have a sizable stash of frozen bananas to use.

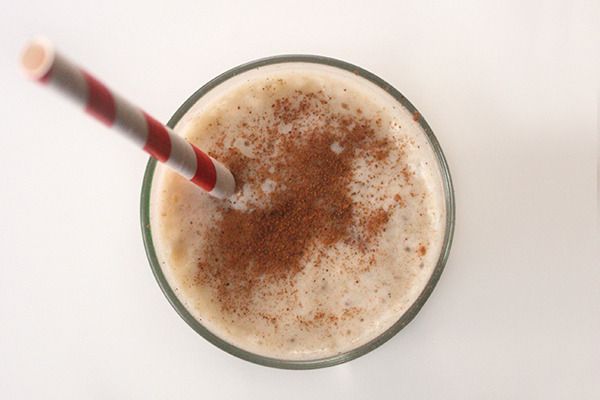
So I guess it was inevitable that with our plethora of bananas and milk, we would end up mixing the two. Throw in some dates (which, by the way, you can totally pit a date with one hand when your darling banana-hating child wants you to hold them while you're attempted to make a snack for yourself) and a dash of cinnamon and you've got a satisfying and relatively healthy treat!


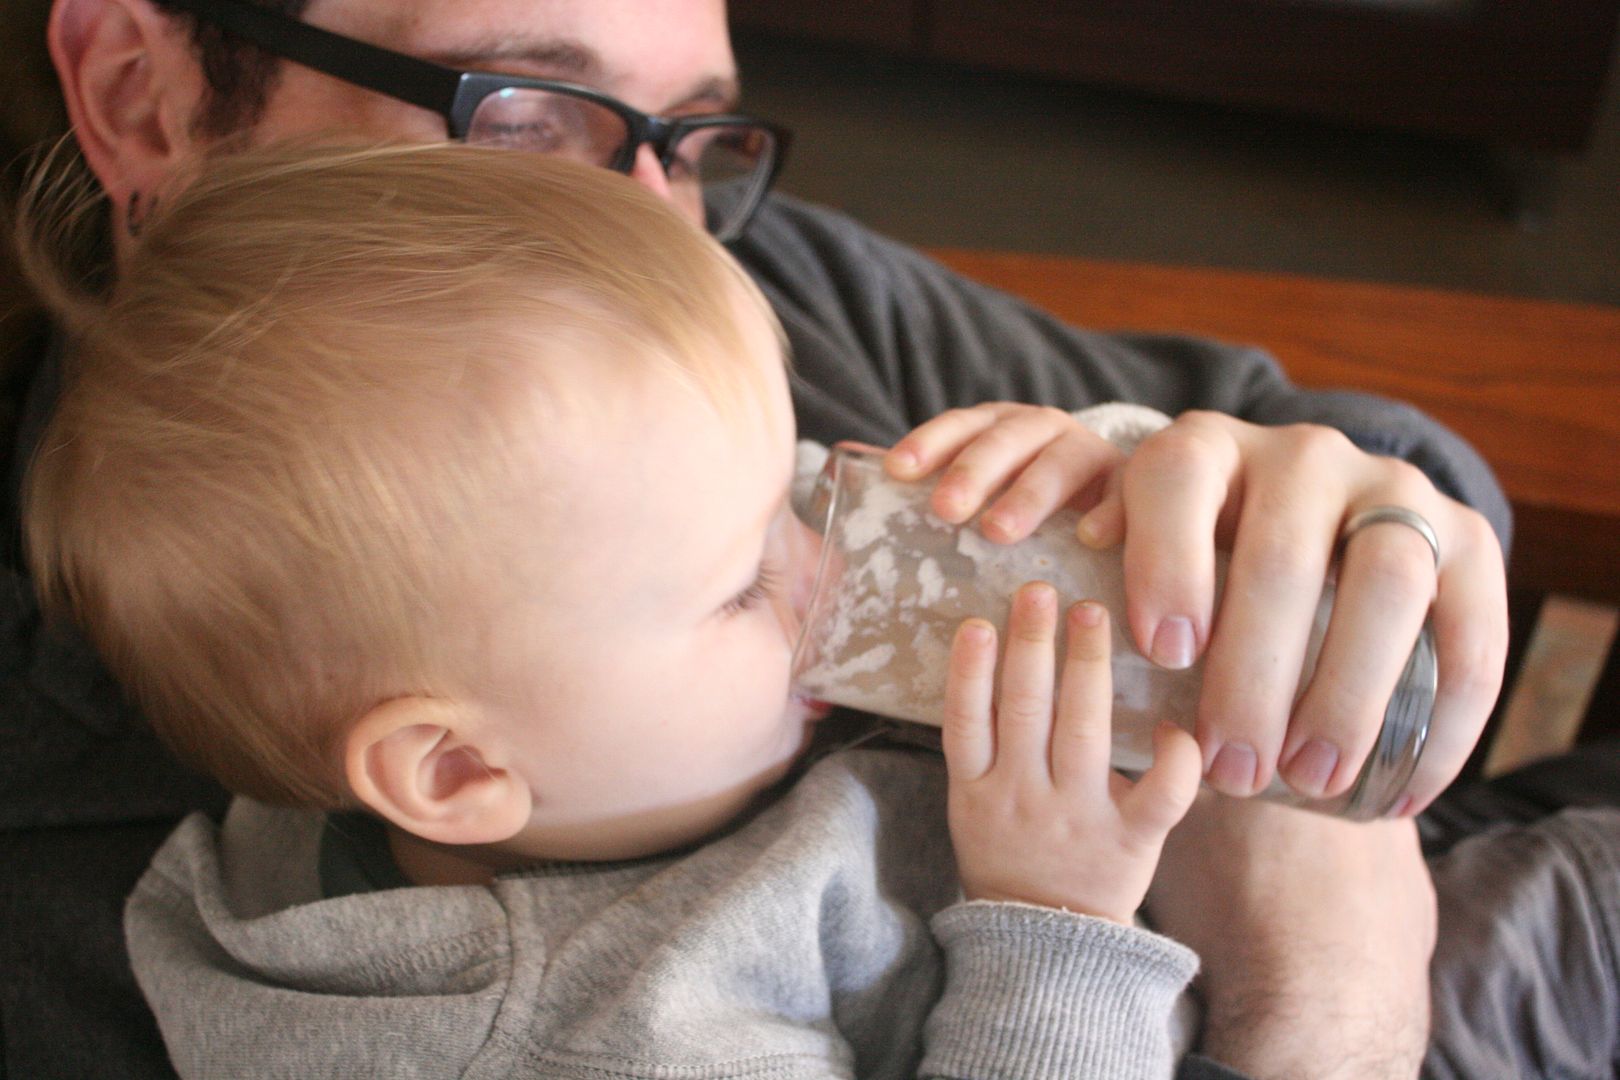
And, surprise surprise, your little one will probably want to try a sip of what you're having. And then he'll want the rest. Who can blame him? It is delicious! We will definitely be enjoying this quick and yummy snack again. And it must be said that the a2 Milk® was every bit as tasty as the milk we typically purchase.

Banana Date Shake

Ingredients

  • 1/2 cup a2 Milk®
  • 1/2 large frozen banana
  • 2 dates (pitted)
  • pinch of cinnamon

Instructions

  1. Put ingredients in a blender.
  2. Enjoy!
If you'd like to try a2 Milk® for yourself, grab this a2 Milk® $1 Off Coupon and check the Product Locator to see which grocery stores near you are carrying it. 

For more information on the a2 Milk Company™ as well as other delicious recipes, check them out on Facebook, Twitter, or Pinterest.

If you try this shake, please let me know what you think!

Visit Sponsors Site

Wednesday, June 17, 2015

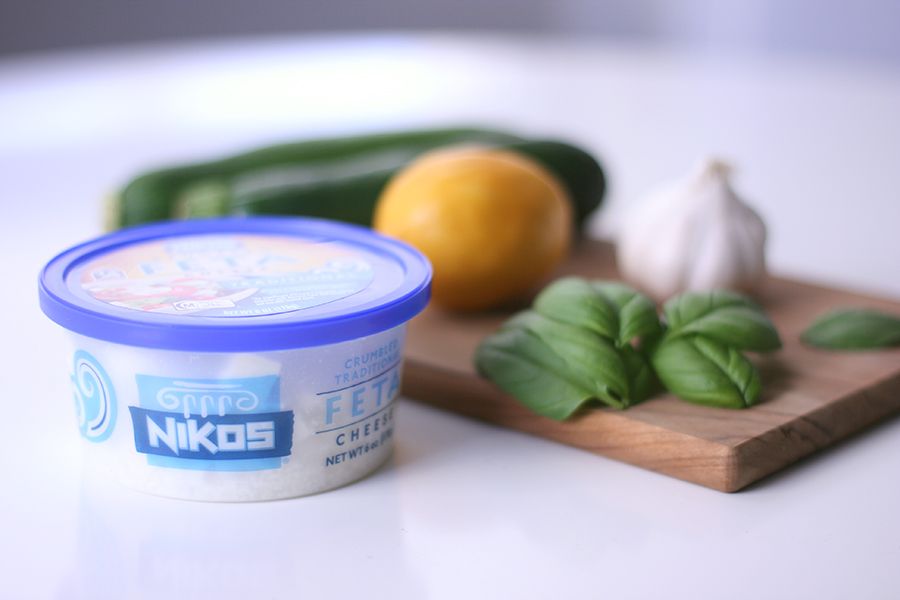
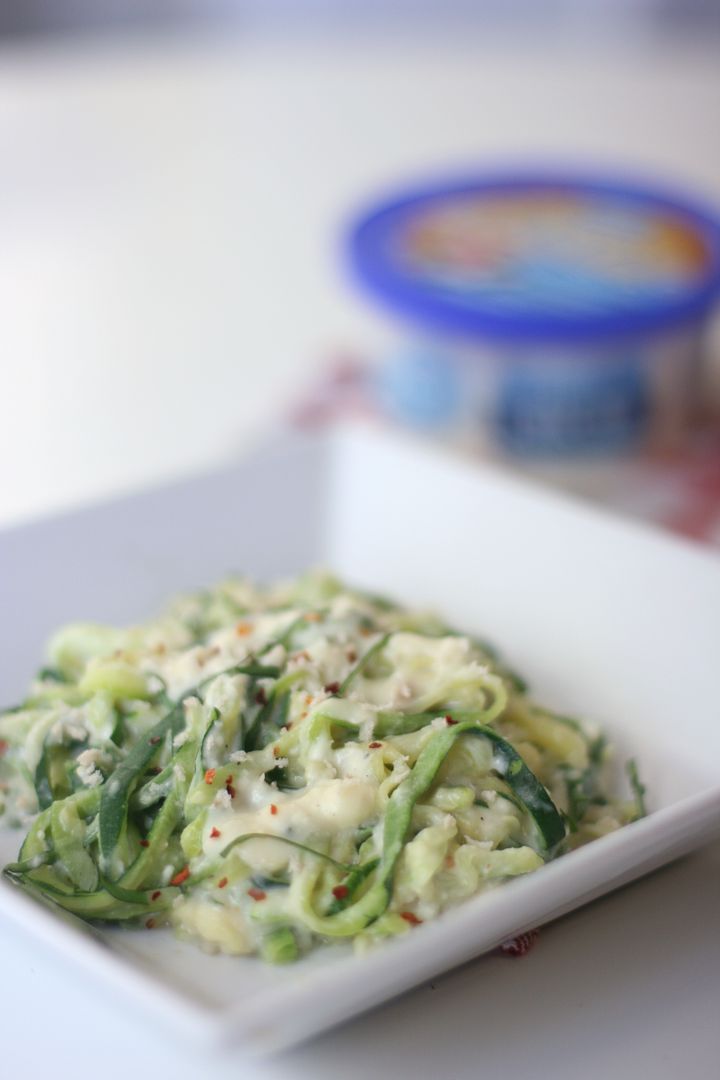
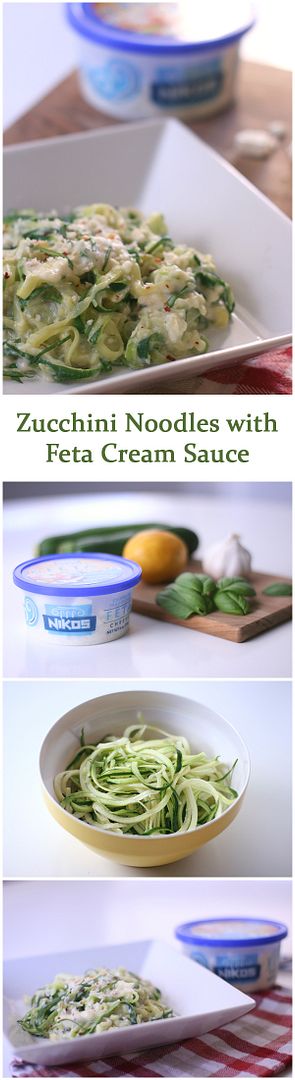
Zucchini Noodles with Nikos Feta Cream Sauce


We nearly always have crumbled feta on hand at home. It is the perfect creamy, salty addition to our salads (like this one). But I realized recently I rarely cook with it and I had to remedy that. 


It just so happens that zucchini and feta make a great pairing and this is the time of year when folks are discovering baseball bat sized squashes popping up seemingly overnight in their gardens. So with that in mind, I created this recipe as a handy way to use up some zucchini. 

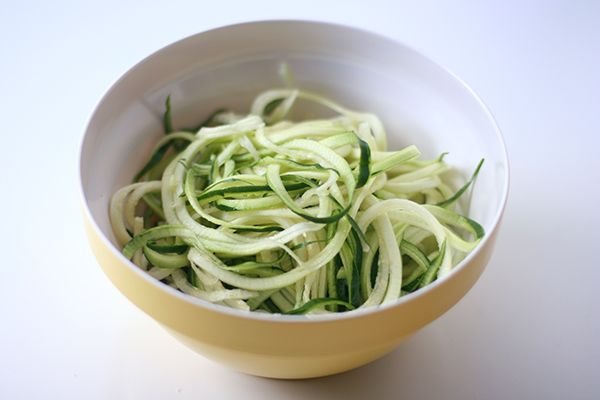
First of all, you'll need a way to cut your zucchini into noodle sized pieces. I used the unfortunately named Veggetti (link in sidebar, if you're interested), but there are a variety of products out there which will noodle-ify your zukes for you.


Once cooked down, these zucchini noodles make a great base for a rich, creamy feta sauce. We gobbled up full bowls of this stuff, but this dish would also make a great accompaniment to a roasted meat main course.


Zucchini Noodles with Feta Cream Sauce

Ingredients

  • 4 zucchinis, cut into noodles
  • 2 tbsp butter
  • 2 tbsp all-purpose flour
  • 1 cup milk
  • 1 6 oz. crumble cup of Nikos Traditional Feta
  • 1 clove of garlic, minced
  • 1 tsp lemon zest
  • 6 large basil leaves, minced
  • 1/2 tsp crushed red pepper (or more, if preferred)

Instructions


  1. Bring a pot off water to boil. Add zucchini for one minute. 
  2. Drain water. Rinse zucchini noodles with cold water. Drain well.
  3. In a medium saucepan, melt the butter over low heat on the stove.
  4. When butter has melted, whisk in flour for one minute.
  5. Slowly pour in milk while whisking until no lumps of flour remain.
  6. Mix in minced garlic and crushed red pepper.
  7. Begin adding feta to the mix, a little at a time, while whisking.
  8. Once the sauce is smooth, mix in basil and lemon zest.
  9. Mix zucchini noodles in with the sauce before serving (or pour the sauce over, if you prefer!)
  10. Enjoy!
And lest you think delicious cheese is the only thing you'll get when you purchase Nikos Feta, may I present my son's favorite new toy. (Seriously. He loves it.)


As if that wasn't exciting enough, Nikos Feta is also hosting a giveaway right now! One lucky contestant will enjoy a seven-day, six-night trip to Honolulu, Hawaii, during the 2015 Hawaii Food & Wine Festival (August 29 - September 13, 2015).

To enter, visit www.nikosfeta.com or the "Hawaii Trip" tab on the Nikos Feta Facebook page by July 31st, and fill out the entry form. That's it! Easy, peasy! Full contest information is available in the Official Rules.

For more great recipes and serving suggestions (and food porn!), visit the Nikos Feta Pinterest Page and Nikos Feta on Instragram.

Many thanks to Nikos® Feta cheeses for sponsoring today’s story and encouraging me to try fun new ways to add feta cheese to my menu!


Thursday, June 4, 2015

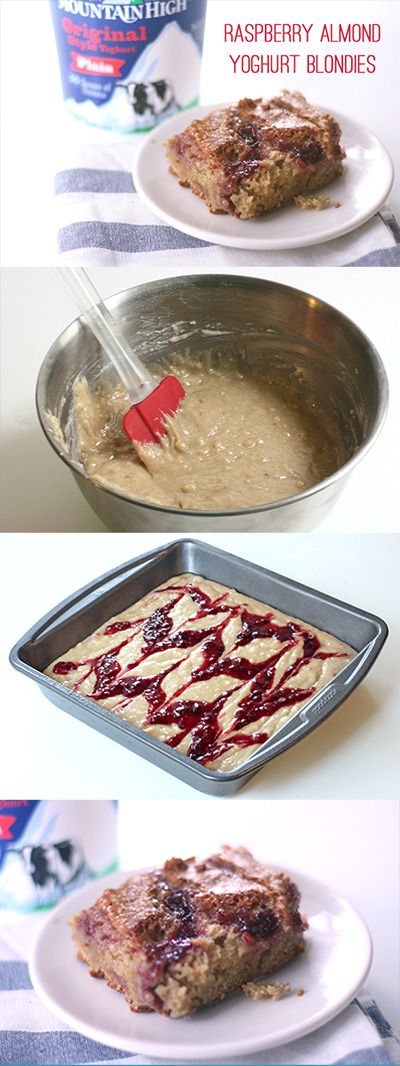
Raspberry Almond Yoghurt Blondies with Mountain High Yoghurt


If you've ever tried the popular boxed brownie mixes that require only yoghurt, you know what a magical combination yoghurt and baking can be. It was with this in mind that I created this recipe using deliciously rich and creamy Mountain High Yoghurt.

I wanted to take the great texture that yogurt adds to brownies and try it in a new flavor combination. Almonds and raspberries are a perfect duo. What's wonderful about these bars is that they do not have any butter or oil in them and the flavor and texture does not suffer one bit!


Ingredients

  • 1 3/4 cup all-purpose flour
  • 1/2 teaspoon salt
  • 1 teaspoon baking powder
  • 3/4 cup brown sugar
  • 3/4 cup sugar
  • 1/2 cup slivered almond (chopped or ground coarse)
  • 1 teaspoon almond extract
  • 1/4 teaspoon salt
  • 2 egg whites
  • 3/4 cup Plain Mountain High Yoghurt (you can use non-fat, low-fat, or original)
  • 1/2 cup raspberry jam

Instructions

  1. Preheat oven to 350°.
  2. Chop or crush slivered almonds.
  3. Mix flour, salt, baking powder, and almond.
  4. Mix in sugar, brown sugar, egg whites, and extract.
  5. Mix in yoghurt.
  6. Pour batter into a greased 8x8 baking dish
  7. Spoon jam into 3 parallel lines across the surface of the batter.
  8. Run a knife gently through the batter in jam, perpendicular to the direction of the jam lines.
  9. Do this in alternating directions, across the surface of the batter to create the pattern.
  10. Bake for 30-40 minutes, or until center is fully cooked.
  11. Remove from heat and allow to cool. 
  12. Enjoy!
Now you may be wondering why Mountain High Yoghurt spells its name that way.

While both "Yoghurt" and "Yogurt" can be found in the dictionary, “Yoghurt” is more similar to how the word is spelled in many European countries. Since it was first produced back in the 1970s, Mountain High Yoghurt has been made the Old World way (it slowly turns into yoghurt while sitting in the cup) so the founders spelled yoghurt with an “h.” Today they consider the “h” to stand for healthy lifestyle or for the hundreds of ways you can use Mountain High Yoghurt to add nutrition to any recipe or meal!

If you'd like to see more great ways to use Mountain High Yoghurt to simplify and improve your favorite recipes, and coupons so you can try it for yourself, check them out here:

Facebook
Pinterest
Instagram

These Many thanks to Mountain High Yoghurt for sponsoring today’s story.