Showing posts with label paint. Show all posts

Wednesday, February 25, 2015

Roundups on Remodelaholic

In case you've missed it, I've been sharing decor round-ups over at Remodelaholic for the last year. Here are some of the fun topics I've shared over there. Check them out if you're looking for inspiration for your next DIY project. And let me know if there's a topic you'd love to see in the future!


Tuesday, November 4, 2014

Clutter-Free Holiday Season


As you may know, we're going to have a baby this holiday season.

As if that weren't excited and life changing enough, we also decided in the 11th hour to buy a new house. Yes, we're going to move somewhere around my 36th week of pregnancy. I'm trying to look on the bright side-- I won't get the inevitable day-after-moving aches because I won't be able to lift all the much.

With all of this going on, it is no wonder money is top of mind right now. Specifically, not spending all of it.

So I have a plan. I am going to try my hardest to do my holiday decorating and gift wrapping only with things I already have. No trips to Michael's for craft supplies. No picking up new gift wrap impulsively at Target or online (even if it is really beautiful) My goal is to clear out the closet of gift wrapping odds and ends (half rolls of paper, and carefully folded pieces I rescued from gifts I've received), use art supplies I already have on hand (sticky letters, felt, and glitter galore), and get creative with alternative wrapping materials.

I think it will be a fun challenge. Are you with me? I'll be sharing my attempts on Instagram. If you'd like to join in (and provide me with inspiration too!), use the hashtag #clutterfreeholiday when you share your decorating and gift wrapping ideas. Gifts count too! At the end, I'll share some of the ideas we've come up with. Sound good?

Let's do this!

Tuesday, November 26, 2013

DIY Mini Chalkboard Place Cards


I wanted to share a little more of the process for the chalboard place cards I made for my Thanksgiving tablescape yesterday, in case you'd like to make them too. I know you can purchase little easels pre-made, but doing a little work yourself can make this project way more affordable. I purchase 3 of the 1/4" square basswood sticks (24" long) and one sheet of 1/8" thick x 3" wide x 24" long basswood.


I began by cutting the sheet of basswood into 6 pieces at 4" lengths. I didn't need more than an exacto blade to do this.


Then I cut the sticks into 4" lengths with one straight edge and one angled edge.

This is the way I made all of my cuts for the stick. Not to scale, obviously.

For 1/3 of the sticks, I cut them each about 3/4" shorter than the rest. These would be the legs that allowed the chalkboards to tilt back a bit.

Then I painted all the pieces with gold leaf (or gold spray paint, or whatever floats your boat), not worrying about the front sections of the chalkboard too much, since they'd be covered up soon anyway.


Next, I taped off the edged of the fronts of the chalkboards  and then gave them two light coats of chalkboard paint.

Once they dried, I peeled off the tape and touched up any spots where the black paint bled onto the gold.


Then I hot glued two legs to the back of each chalkboard.


And finally, I wedged the last shorter legs into the space between the two glued pieces. I opted not to glue these into position permanently so that it would be easy to store these away between uses.

And that's it. Pretty simple, right? And such a cute detail for your dining companions!


Friday, October 25, 2013

Last minute costume: Dinosaurs


I don't have children (or even someone else's children) to make costumes for, so I didn't intend to create a costume tutorial. I have to admit that I'm only sharing this because it required B to dress up and pose for me.

I giggled the whole time I was taking photos.

It was so worth it.

Of course, if you'd prefer to hear about how I made these for cute kids to wear trick-or-treating, we can go with that. What I will say is that no matter who they were intended for, they were really simple to make in just a few hours, with just a single trip to the store.


I know this is probably not the first DIY dinosaur costume you've ever seen, but this one will not make you resemble a lamprey like some other dino-costumes might. Just sayin'.


For T-rex, all you really need is a green hoodie, felt, stuffing, cardboard and paint. That's it! And you might even have some of those items on hand. Lucky you, craft hoarder!


You can enlist your talented friend to help with sewing (thanks, Melissa!) if you wish, but I wouldn't hesitate to whip out my trusty glue gun for this either. How fun are the claws? Rahhhr!

Next up, pterodactyl! 


For the pterodactyl, add a green umbrella to the mix. This was the hardest thing to find. And by hard, I mean not that hard since I already told you we bought everything at one store. Those dangling feet on the front are just the best thing ever.


Is B a good sport or what?!


The best part of these costumes is that they are self-contained and easy to move in. That is helpful for trick-or-treating children and partying adults alike.

So there ya go. You can procrastinate and still knock out a fun costume in one day.

What's the best last minute costume you've come up with? My husband gets a million bonus points for rocking these costumes for me, right?

Tuesday, July 23, 2013

Kitchen accessory ideas

Since B and I got about 90% finished with the kitchen and then lost steam (as we do), I am still without any before and after pictures to share with you. 

In the meantime, I have been thinking about what items I can add to really put the finishing touches on the whole project. I have determined that new window treatments will set the tone for the kitchen, so I've been ordering fabric samples to try out.

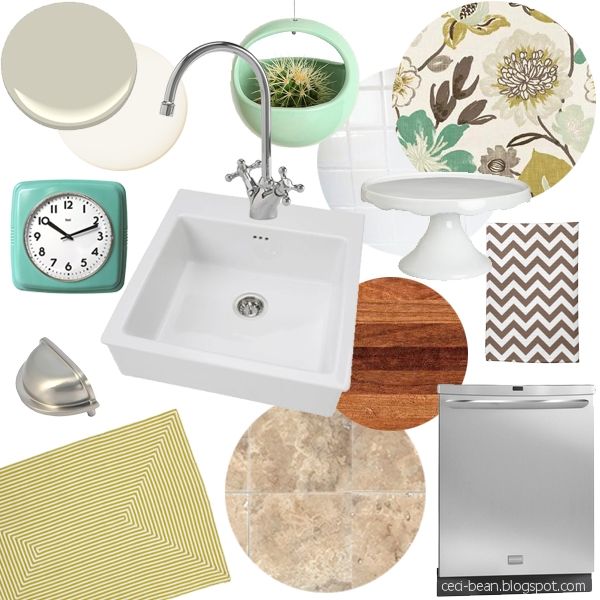
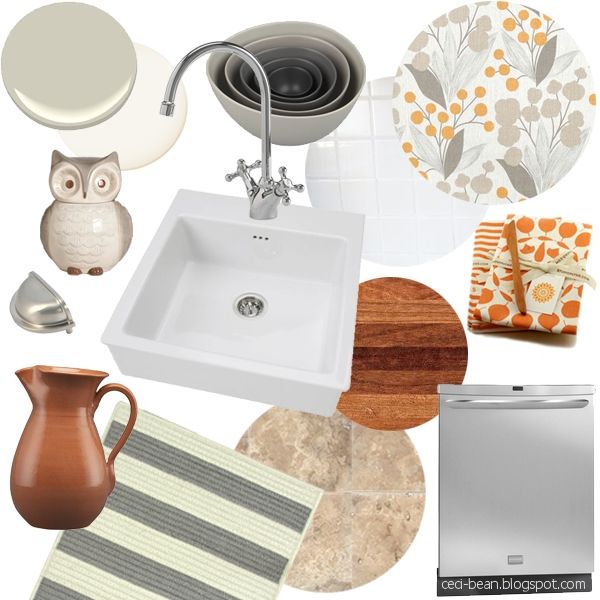
I think I've narrowed it down to my two favorites. So in order to help B see what I'm picturing, I made a couple moods boards. He picked his favorite pretty quickly. Any guesses which one?

hanging planter / fabric / cake stand / towel / rug / clock

bowls / fabric / tea towels / rug / pitcher / cookie jar
I think either direction could be fun. Hopefully, I'll be sharing photos of something soon!


I shared this post on Hookin Up with House of Hepworths.

Friday, June 14, 2013

Honey, I Broke the Kitchen

Oh friends, what have I done?

Last Friday I had the day off from work and I had an impulse to start tearing my kitchen to shreds. This is probably the sort of thing I should have discussed with my dear husband, but somehow I thought he'd be excited forgiving when he saw what I'd done. When he came home from work that day, he quietly surveyed my destruction and said "I guess we'll be building a kitchen this weekend."


He was right.

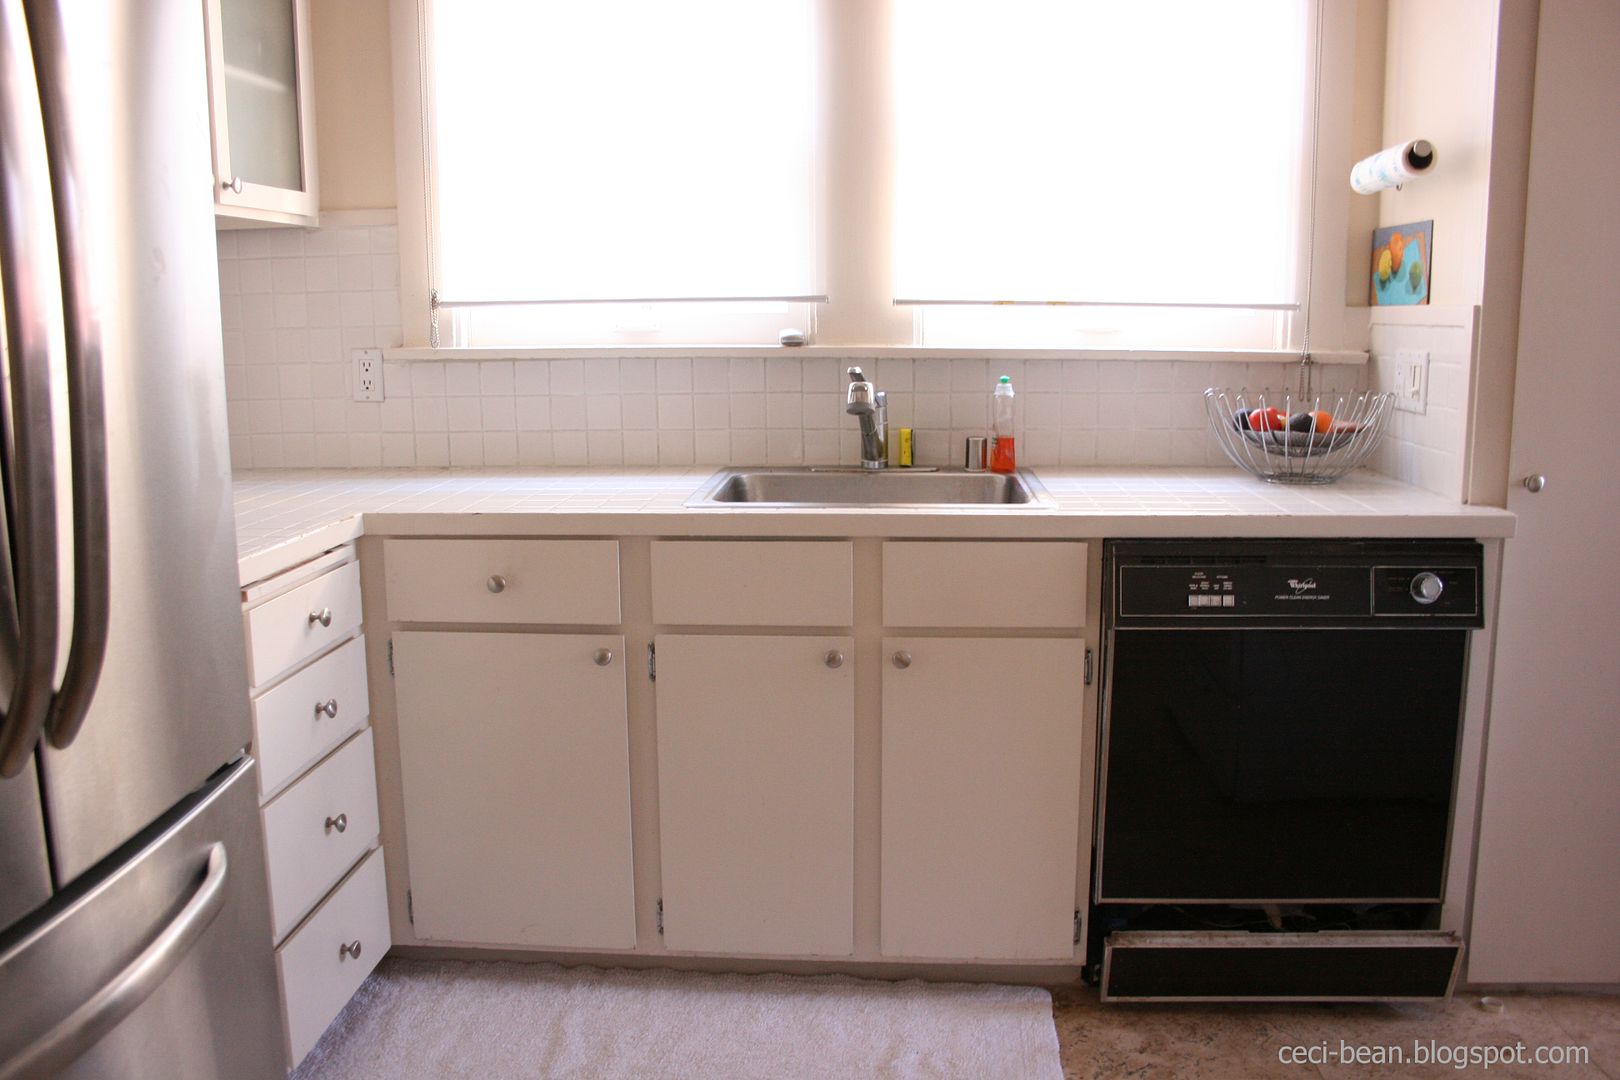
Let me back up. Our kitchen is small, sure, but it isn't awful by any stretch. So while there are things I wouldn't have chosen (tiled countertops with impossible-to-clean grout, I'm looking at you), B and I were to content to live with it, as is, since we bought the house in 2010.


When we moved in, we bought a stainless fridge even though the dishwasher was black and the stove was white. It really didn't bother me and we justified it by assuming we'd have to replace the dishwasher at some point since it was going to die since it was a much older model than the other appliances.


Well, in November of 2012 (yes, eight months ago!), that happened. One day, the dishwasher stopped working. And while we could have had someone repair it, we were ready to bid adieu to it. And we splurged on a new stainless model.

But when we scheduled the removal of the old one and the replacement of the new one, we learned that it wasn't going to be quite so simple. The previous owners had installed the floor tiles in front of the old dishwasher and it wasn't going to come out quite as easily as we had hoped. Or really, at all.

Folks, please consider this if you're redoing your floors: Pull the dishwasher out and extend the flooring under it. Seriously. If it doesn't come back to bite you in the butt, it will be a headache for the next owners of your home.

So, much the way pretty much all projects in our home go, we then waited while we fretted/avoided/overanalyzed our predicament.

After much discussion, we decided maybe it was time to look at replacing the countertops we weren't so in love with anyway.

I filled my Pinterest "kitchen" board full of dream remodels. I was pretty sure I had to have marble. We got estimates and it sounded pretty good. Then I got scared by the horror stories of marble maintenance. We looked at other stone and manmade surfaces and didn't see anything quite as beautiful.

And then we started toying with the idea of butcher block counters. And that started sounding pretty good. So of course I started pinning kitchens with those! So soon we had it pretty worked out that we wanted new counters, a new sink and faucet, a new dishwasher (which was waiting anxiously to be installed), and maybe some fresh non Band-Aid colored paint. We had a plan. And then we waited.

And waited some more.

We discussed the pros and cons of hiring someone to do this work. Actually, we pretty much decided this was more than we could take on ourselves, but we talked to 3 different contractors about helping us with this project and all of them stopped responding when we said we'd like to schedule the work.

And then we waited some more.

Aaaaand now here we are, 8 months after our dishwasher broke, finally making progress on our kitchen!

Yeah!

(I really wasn't joking about our snail's pace.)

Can't wait to show you the progress we've made!


Thursday, April 18, 2013

Bedroom revamp saga - Part Two-esque

Excuse Julius' inappropriate photobomb position.

Wow, I really do finish projects at a snail's pace. I mean, in February I was all "Ooh, I can barely wait to paint my room!" Aaaand then I bought the paint and did nothing.

Well, not nothing. I've made some small changes.

I've purchased new bedding, curtains, accessories, and a light fixture. And I recovered the headboard with a tablecloth which actually worked out really well. I recommend it. (Although you may want to be more careful than I was so that you don't end up with unintentional "tufting" which my loving husband refers to as buttcracks. It's not as bad as it sounds. The buttcracks are subtle and the fabric is holding up well.

Oh, you couldn't tell I went to art school? Shocker.

The light fixture (skillfully drawn in above) is sitting on our dresser waiting for us to figure out how to cover up the hole in the ceiling left behind by the boob light. This problem never occurred to me when I ordered my pretty new light. One of these days, folks!


For the bedding, I really wanted a crisp white duvet. But we have two cats (one black, one orange) so unless I want to wash my duvet cover every freaking day, it just isn't going to happen. So I picked up a plain charcoal duvet cover at Ikea that is fine. A bit shiny, but fine. I would have picked something with some cool pattern, but I accidentally fell in love with these sheets I saw at Target. Seriously, I love them. They look old timey, and the quality is amazing. They even have straps built in to keep the sheets from pulling off the corners of the mattress. Am I the only person who tosses and turns enough to do that constantly? Seriously, best sheets.


The pictures on the wall are sort of random, but they make me happy. My husband is an aspiring photographer and likes to try out arty effects when he snapping pics. (Not like instagram filters and photoshop effects, but exposures and things.) These pictures are photographs of a fireworks display we watched last Fourth of July that B took. I like them visually, but I extra like them because he took them.

Ay oh way oh, ay oh way oh... walk like an Egyptian.

A few other items I added were the canvas box on the shelf of my bedside table to store junk magazines and other items I want to keep nearby (which I added a decorative ribbon to for a bit of color), a few decorative pillows for the bed, and the cute little vases from Target. And my little wood mannequin.

Oh, and see the Captain's Mirror drawn in on the left side up above? (What, you couldn't tell that's what it was?) Well, I (like many other people) have fallen for the $1,200 specimen from BDDW. I've been on the lookout for a good knockoff. I've seen some at the low low price of $300, but I want a better price than that. And I have a plan. In fact, it is underway, so stay tuned!

Bedroom, in February
Bedroom, in April

So am I on the right track? Or does it look pretty much the same? Or, gulp, was it better before?

I linked this up on Hookin Up with the House of Hepworths linky party, Six Sisters Stuff, Chic on a Shoestring Decorating, and tatertots and jello.