Monday, December 9, 2013

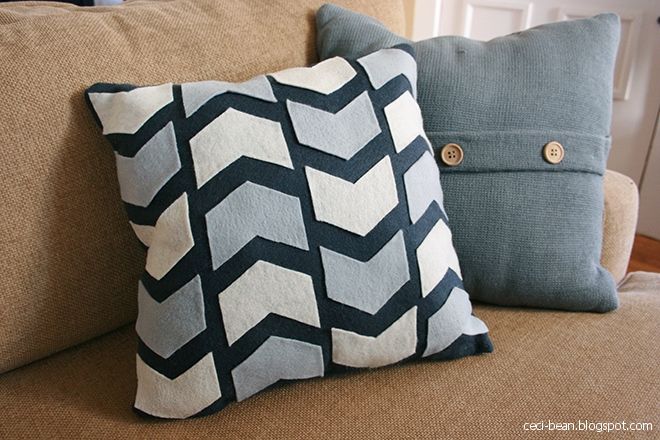
Super Easy Felt Pillow


I am not even going to call this a tutorial. Because who needs one anyway?

1. Cut felt into 2 pieces slightly bigger than a pillow. (Hot tip: Use a pillow case for reference!)
2. Sew Glue felt on three sides. (Hot tip: use fabric glue if you can't sew or are too lazy to sew!)
3. Turn inside out. (Hot tip: cut down the corners at a diagonal to reduce bunching when you turn it inside out!)
4. Cut out smaller pieces of felt. (Hot tip: pin felt to paper in the shape you want before you cut!)
4. Sew Glue other pieces of felt to your big piece of felt. (Hot tip:... I got nothin'. Make it pretty.)
5. Stuff big felt with pillow stuffing. (Hot tip: I've heard you can use plastic bags for this, but I've never tried!)
6. Sew Glue closed the felt pillow. (Hot tip: use lots of pins to help hold it closed while your glue dries!)

Let's just call this post a friendly reminder of an easy crafty project that would make a nice gift for someone.


Linking up to Dare to DIY.

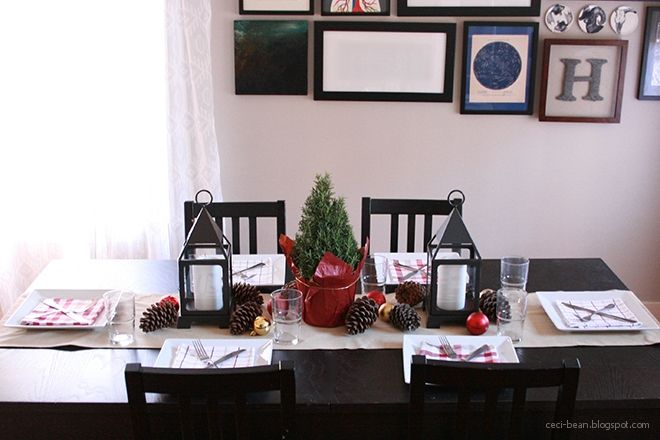
Casual Christmas Tablescape


We won't be hosting Christmas this year, but I thought it would be fun to put together a festive little table setting for a casual dinner with some friends.

I had picked up a couple packs of these red, white, and tan dish towels on clearance at Target earlier in the year. The price was right and they fit the laid back feel of our dinner.


I used lanterns and ornaments I had on hand, along with a little rosemary tree (like the one I used on the mantel) and pine cones from the yard. The runner was a scrap of fabric leftover from when we recovered our headboard in the bedroom, but the fabric had been a tablecloth in its former life so it seemed appropriate to use it for this project. Circle of life and all that.

Please disregard the big blank frame on the wall in the back. One of these days I'll put the picture in there.
Pretty simple, but then not all dinners have to be fancy feasts, right?


Linking up to Christmas Ideas with Songbird.

Sunday, December 8, 2013

DIY Gramophone iPhone Speaker


Have you seen those gramophone speakers for iPhones at places like Restoration Hardware and Pottery Barn? I think they are just the coolest things. Super sculptural and they actually work! I really wanted to recreate one, but I could not figure out where to find a horn that was a reasonable price.

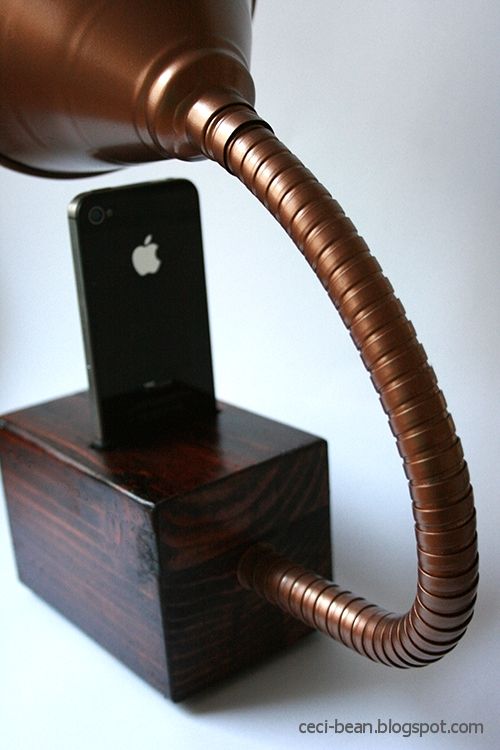
So I started thinking about what else I could use to recreate this. And then I realized, a funnel might do the trick! I picked up a galvanized steel funnel with a flexible tube (like this one) at my local automotive shop. I sprayed the funnel with a bronze spray paint to fancy it up a little.

While the paint was drying, I explained to B how I imagined the base would need to be drilled. He went out to the garage and 10 minutes later he had a "prototype" ready to go.

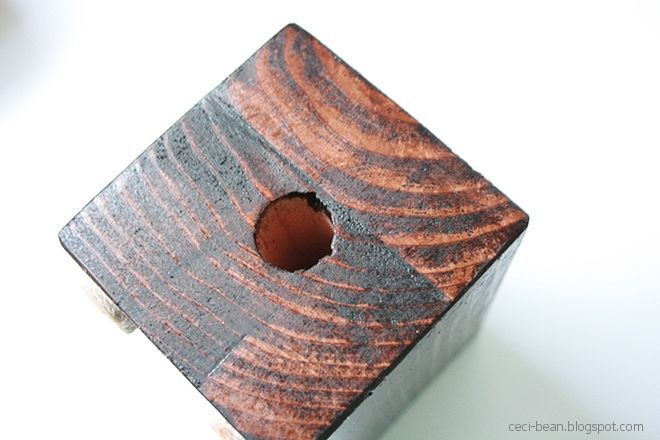
Basically, he used his dremel with a 3/4" spade bit to bore a hole into the back of the base (a piece of Redwood 4x4, approximately 6" long), about half the depth of the base.


Then, he marked out on the top of the base where the iPhone would sit. (It should be situated over the end of the hole you just made for the funnel)


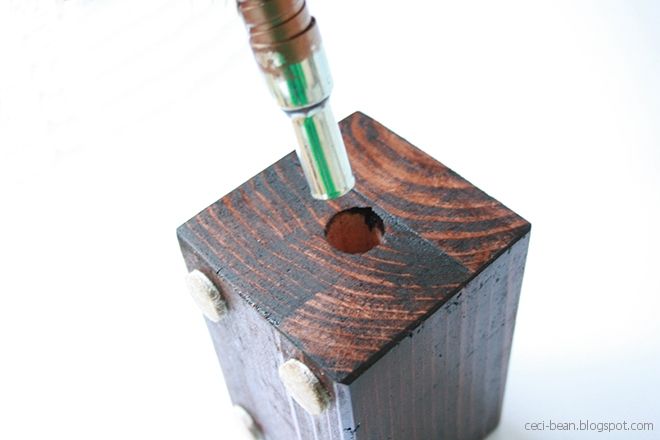
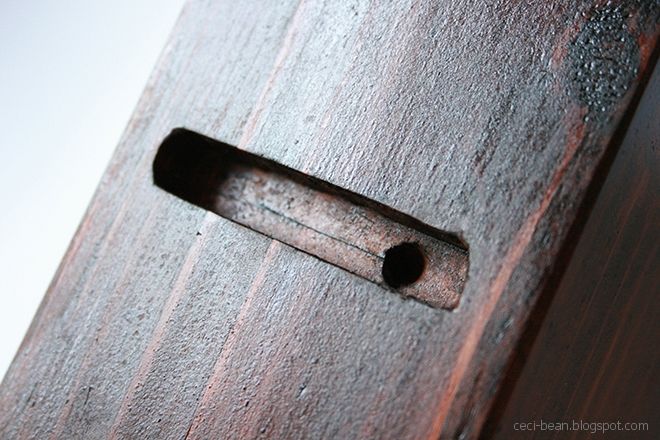
Using a drill with a 1/4" drillbit, B started at the right edge of the marked out area and drilled down at a diagonal to meet the other hole.

Then using the dremel with a router bit, he cut away the section where the iphone would sit, which positioned the opening under the iphone speaker.

We sanded and stained the base (Mission Oak stain).


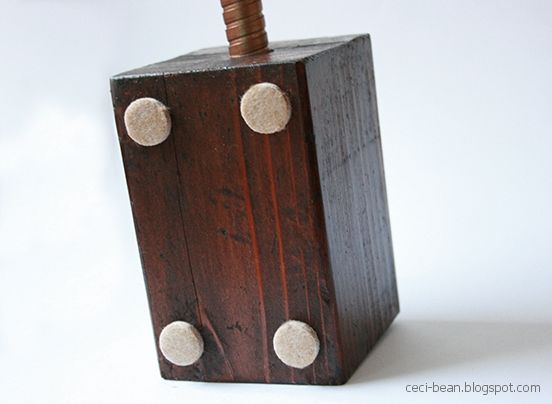
As a last step, we added little felt feet to the base and put the funnel tube into the hole.


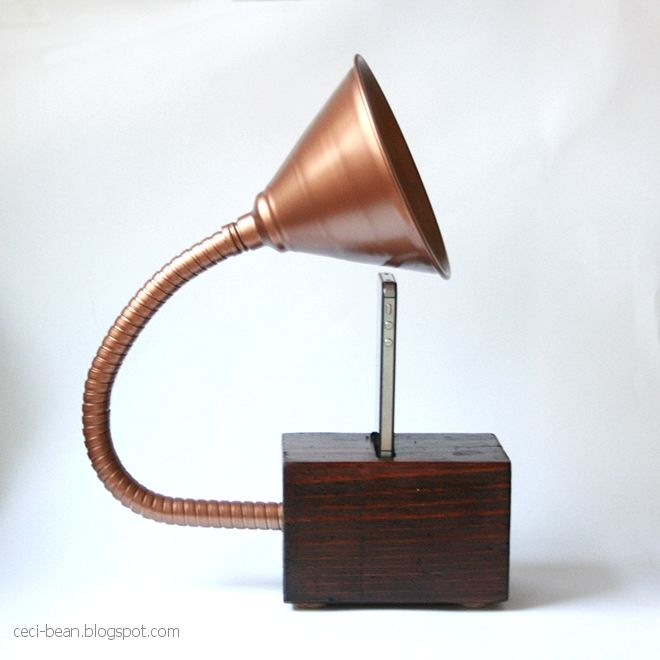
Ta-da! A gramophone inspired passive speaker for the iphone!


We popped the phone in the base, turned on iTunes, and the sounds started coming out of the funnel!
It was pretty cool. Ultimately, the sound was not as amplified as much as I'd hoped, which is why I named this a "novelty" speaker. I mean, it won't replace your Bose sound system or anything, but you can bend the funnel to project the sound in different directions.


I think this could be a great Christmas gift for a music-loving friend. The materials are under $10 bucks (wood, funnel) and you can paint or stain with whatever you've got on hand!

So that's it. Pretty and pretty unique. Do you have anyone on your list who you'd make this for?

Linking up to Dare to DIY.

Saturday, December 7, 2013

Green and Gold Christmas Mantel


When I started thinking about what to put on my mantel this year for Christmas, it was warm and sunny outside. It still felt like fall.

So now that it is nearly at record low temperatures in the Bay Area (there are rumors of snow in San Francisco!), I'm looking at my mantel and wondering if it is really Christmasy enough, despite the ornaments.

Eh, I think it'll do. This coldness can't last forever, right?


This was the first wreath I've ever made and I like how it turned out! I trimmed branches from the hedge in our yard, and tied them to the other half of the embroidery hoop I had floating around the house ever since I made the captain's mirror. I'm sure it is even prettier to me since it was essentially free, right? Ha!


And the chalkboard is contact paper on the picture frame. I decided not to use the chalkboard spray on this because a) it's too freaking cold out to spray anything and b) now it won't be permanent!

The ornament garland if leftover from last year's mantel(s) and the three panels on the wall are pieces of wrapping paper (I think?) from World Market.

So that's my Thanksgiving Christmas mantel!


Linking up to Link Party Palooza with Tatertots & Jello, Holiday Cheer in the Blogosphere with Our Fifth House, All Things Christmas with Happy Hands at Home,  Remodelaholics Anonymous with Remodelaholic, Christmas Ideas with Songbird,  Dare to Deck the Halls, and Thrifty Decor Chick's Christmas Tree Party.