I like the idea of handmade gifts. Occassionally, I am even inspired to make
one. Most of the time I start something and halfway through realize it's gonna suck, or at the very least take way more time than I've allowed myself. At a certain point, you have to ask yourself if your homemade gift is really worth the time and effort. Not because the recipient isn't totally worth it, but because you don't want to give them something you wouldn't love to get yourself just because you've wasted a ton of time and
craft supplies energy making something that is
meh.
Lucky for me (and you, should you make this for someone too), this gift took just a bit of time, a few supplies you might have on hand, and not
too much skill! And it is still something I would give a friend without apology.
My inspiration for this project was these geometric necklaces.
I immediately thought this could be done with
shrinky dinks. Lucky for me, I am an adult who has that sort of thing on hand!
Yeah, I play with
shrinky dinks. I have an extensive assortment of play-doh in my home also. And legos. I like to think I'm a cool aunt who has fun things to play with when the nieces and nephews visit. In reality, I think I just never grew up. Don't judge.
Anyway, all you really need are these things, all of which I already had except the necklace chain.
A couple things to note here. I intend to experiment with the white spray also, but did not actually use it in the making of the necklace seen in this post. I'll be sure to share a pic if I try that too!
- I should have included a ruler because I certainly needed one. I made a ton of mistake lines in trying to draw out the pattern I wanted. You could also print a design from your computer directly onto the plastic. I tried this both ways, and it was, in fact, much easier than trying to draw it by hand.
- I recommend making your pattern twice the width and height you will want your finished piece to be. I thought I made mine comically big and it still looks smaller than I thought it would.
- Use a sharp blade to cut this, but don't try to cut through on one pass. Put light pressure on the blade and go over the cut multiple times. You'll have more control and will be less likely to accidentally cut all the way through a part that isn't meant to be cut.
- Use straight edged designs. Curves are hard to not mess up!
- Don't forget to cut small holes for the necklace chain to attach to before shrinking.
- Be sure to put your shrinky dink between two flat surfaces immediately after you remove it from the oven. This will help flatten it if it is a bit warped.
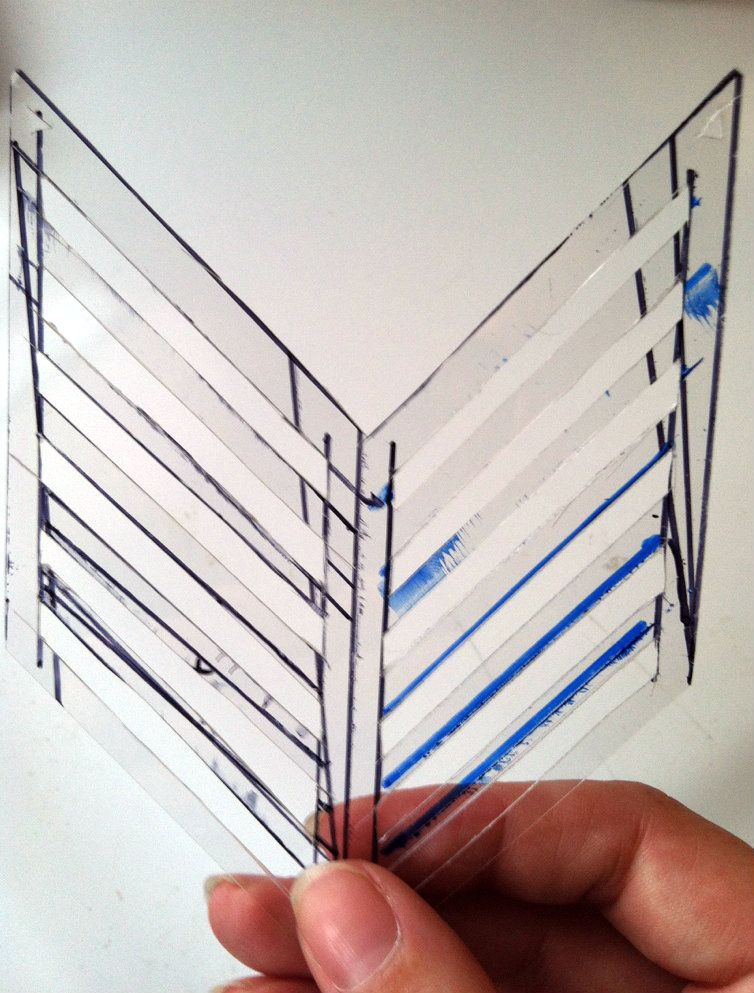
At this point, you may think this looks pretty crappy. Good thing shrinking is a form of magic that
minimizes a lot of mistakes. See what I did there?
And whatever mistakes are still present can be masked with
spray paint. If that doesn't work, just embrace the imperfections. Afterall, this is
handmade!
Putting the chain on was a piece of cake and I actually think this is a pretty rad little necklace that I would wear myself. [edit: I also put a layer of clear coat nail polish over it. I figured it might help prevent the paint chipping or staining or poisoning or whatever spray paint might do to a person.]
This project was part of the
Dare to DIY challenge hosted by
Decor and the Dog,
Maybe Matilda,
Newly Woodwards, and
Two Twenty One. Be sure to stop in and see what other ladies came up with!And, I also linked to the
House of Hepworths Party.